Natural Gardening, Vegetable Trials

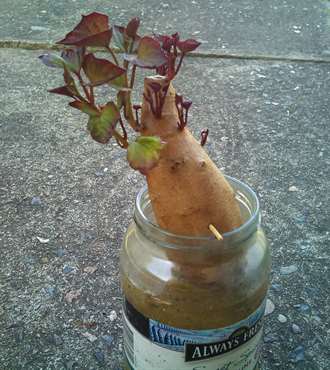
Push toothpicks into the Organic Sweet Potatoe and suspend in water
For quite a while I avoided growing sweet potatoes. It seemed too much like hard work. First you had to get a sweet potatoe to shoot vines and them you had to take the vines off and plant them.
After getting on to YouTube and seeing how you get the vines (called slips) to grow, I decided to have a go and see what turned out.
Once you have sweet potatoes in the ground, unless you are pretty careful, you will have them for life. They are like a weed and will take over the place. It would be pretty difficult not to get a crop. I have beans where the sweet potatoes were and am still pulling out vines shooting through the soil. Admittedly I am talking about the gold or orange coloured ones. I didn’t have as much success with the purple ones. Got more vine than potatoe.
The following paragraph is from Wikipedia http://en.wikipedia.org/wiki/Sweet_potato
The plant is a herbaceous perennial vine, bearing alternate heart-shaped or palmately lobedleaves and medium-sized sympetalous flowers. The edible tuberous root is long and tapered, with a smooth skin whose color ranges between yellow, orange, red, brown, purple, and beige. Its flesh ranges from beige through white, red, pink, violet, yellow, orange, and purple. Sweet potato varieties with white or pale yellow flesh are less sweet and moist than those with red, pink or orange flesh
Growing the slips
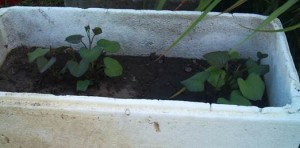
An old styrofoam box, some dirt and an Organic Sweet Potatoe. Just add water
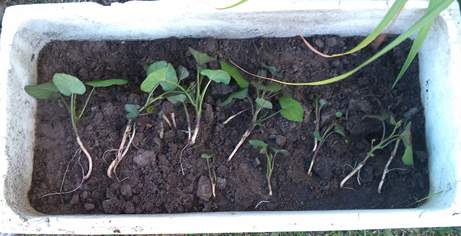
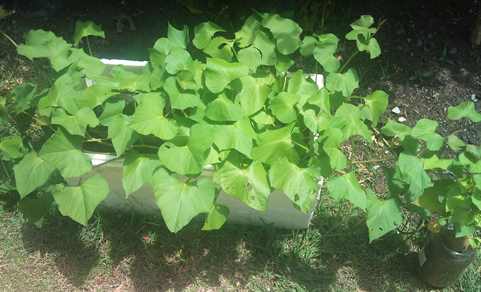
As with most things tried for the first time, I tend to take too much care of the plant. With sweet potatoes they are bloody near impossible to kill, no matter how poorly you look after them. The easiest way I found was to throw some soil into a styrofoam box with a couple of drainage holes in the bottom. Water and wait for the slips to appear. I tried another way with the tuber suspended in a jar of water, but the ones in the dirt grew much quicker. Slips from both were planted and both ways produced a great harvest.
Finding a Source of Slips
The easiest way to start some slips is to buy a couple of Organic sweet potatoes. The ones in the supermarket have an inhibitor sprayed on them to stop them growing. The organic ones will start gowing slips all by themselves when the temperature starts to warm and the hours of daylight increase toward spring, depending on temperature. In that way they are similar to potatoes.

Just pull the slips off at the tuber and plant. So easy
Planting Out
When planting, it is better to pull the slips off the potatoe and plant them in the soil. In the bed I grew the tubers grew vertically down into the soil and the vines wanted to take over the rest of the garden. The garden bed was dug
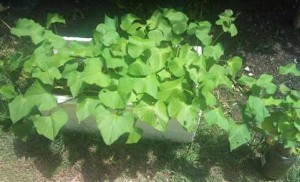
The slips just keep on growing. Slips in jar and dirt three months later
over pretty well and there was a fair bit of compost dug in. At least four times during the growing period, about 6 months where I am, I got out the hedge clippers and cut back the vines.
Harvesting
I found the easiest way to harvest was to pull up the vine and find where the tubers were. The vine leads back to the tuber where there were between 4 – 8 tubers. Some of the tubers were quite big and weighed over 2kg each. The majority were around 400 (1lb) to 800gms (2lb). The harvest was in excess of 150kg and the neighbours and friends were well supplied.
I still have about 40kg of sweet potatoes stored in the shed and it is now the middle of winter and 3 months after harvesting them. They go well in the slow cooker in a beef casserole and make a great sweet when cooked very slowly for a couple of hours in a sugar syrup.
And they make great chips. Cut thinly, put a small amount of olive oil in a baking dish, rub the slices in the oil. Grind some rock or sea salt over and bake in the oven for around an hour at about 200C. You need to check every now and then, move them around a bit and rotate the dish and ensure they don’t burn. You just want them crisp.
Natural Gardening

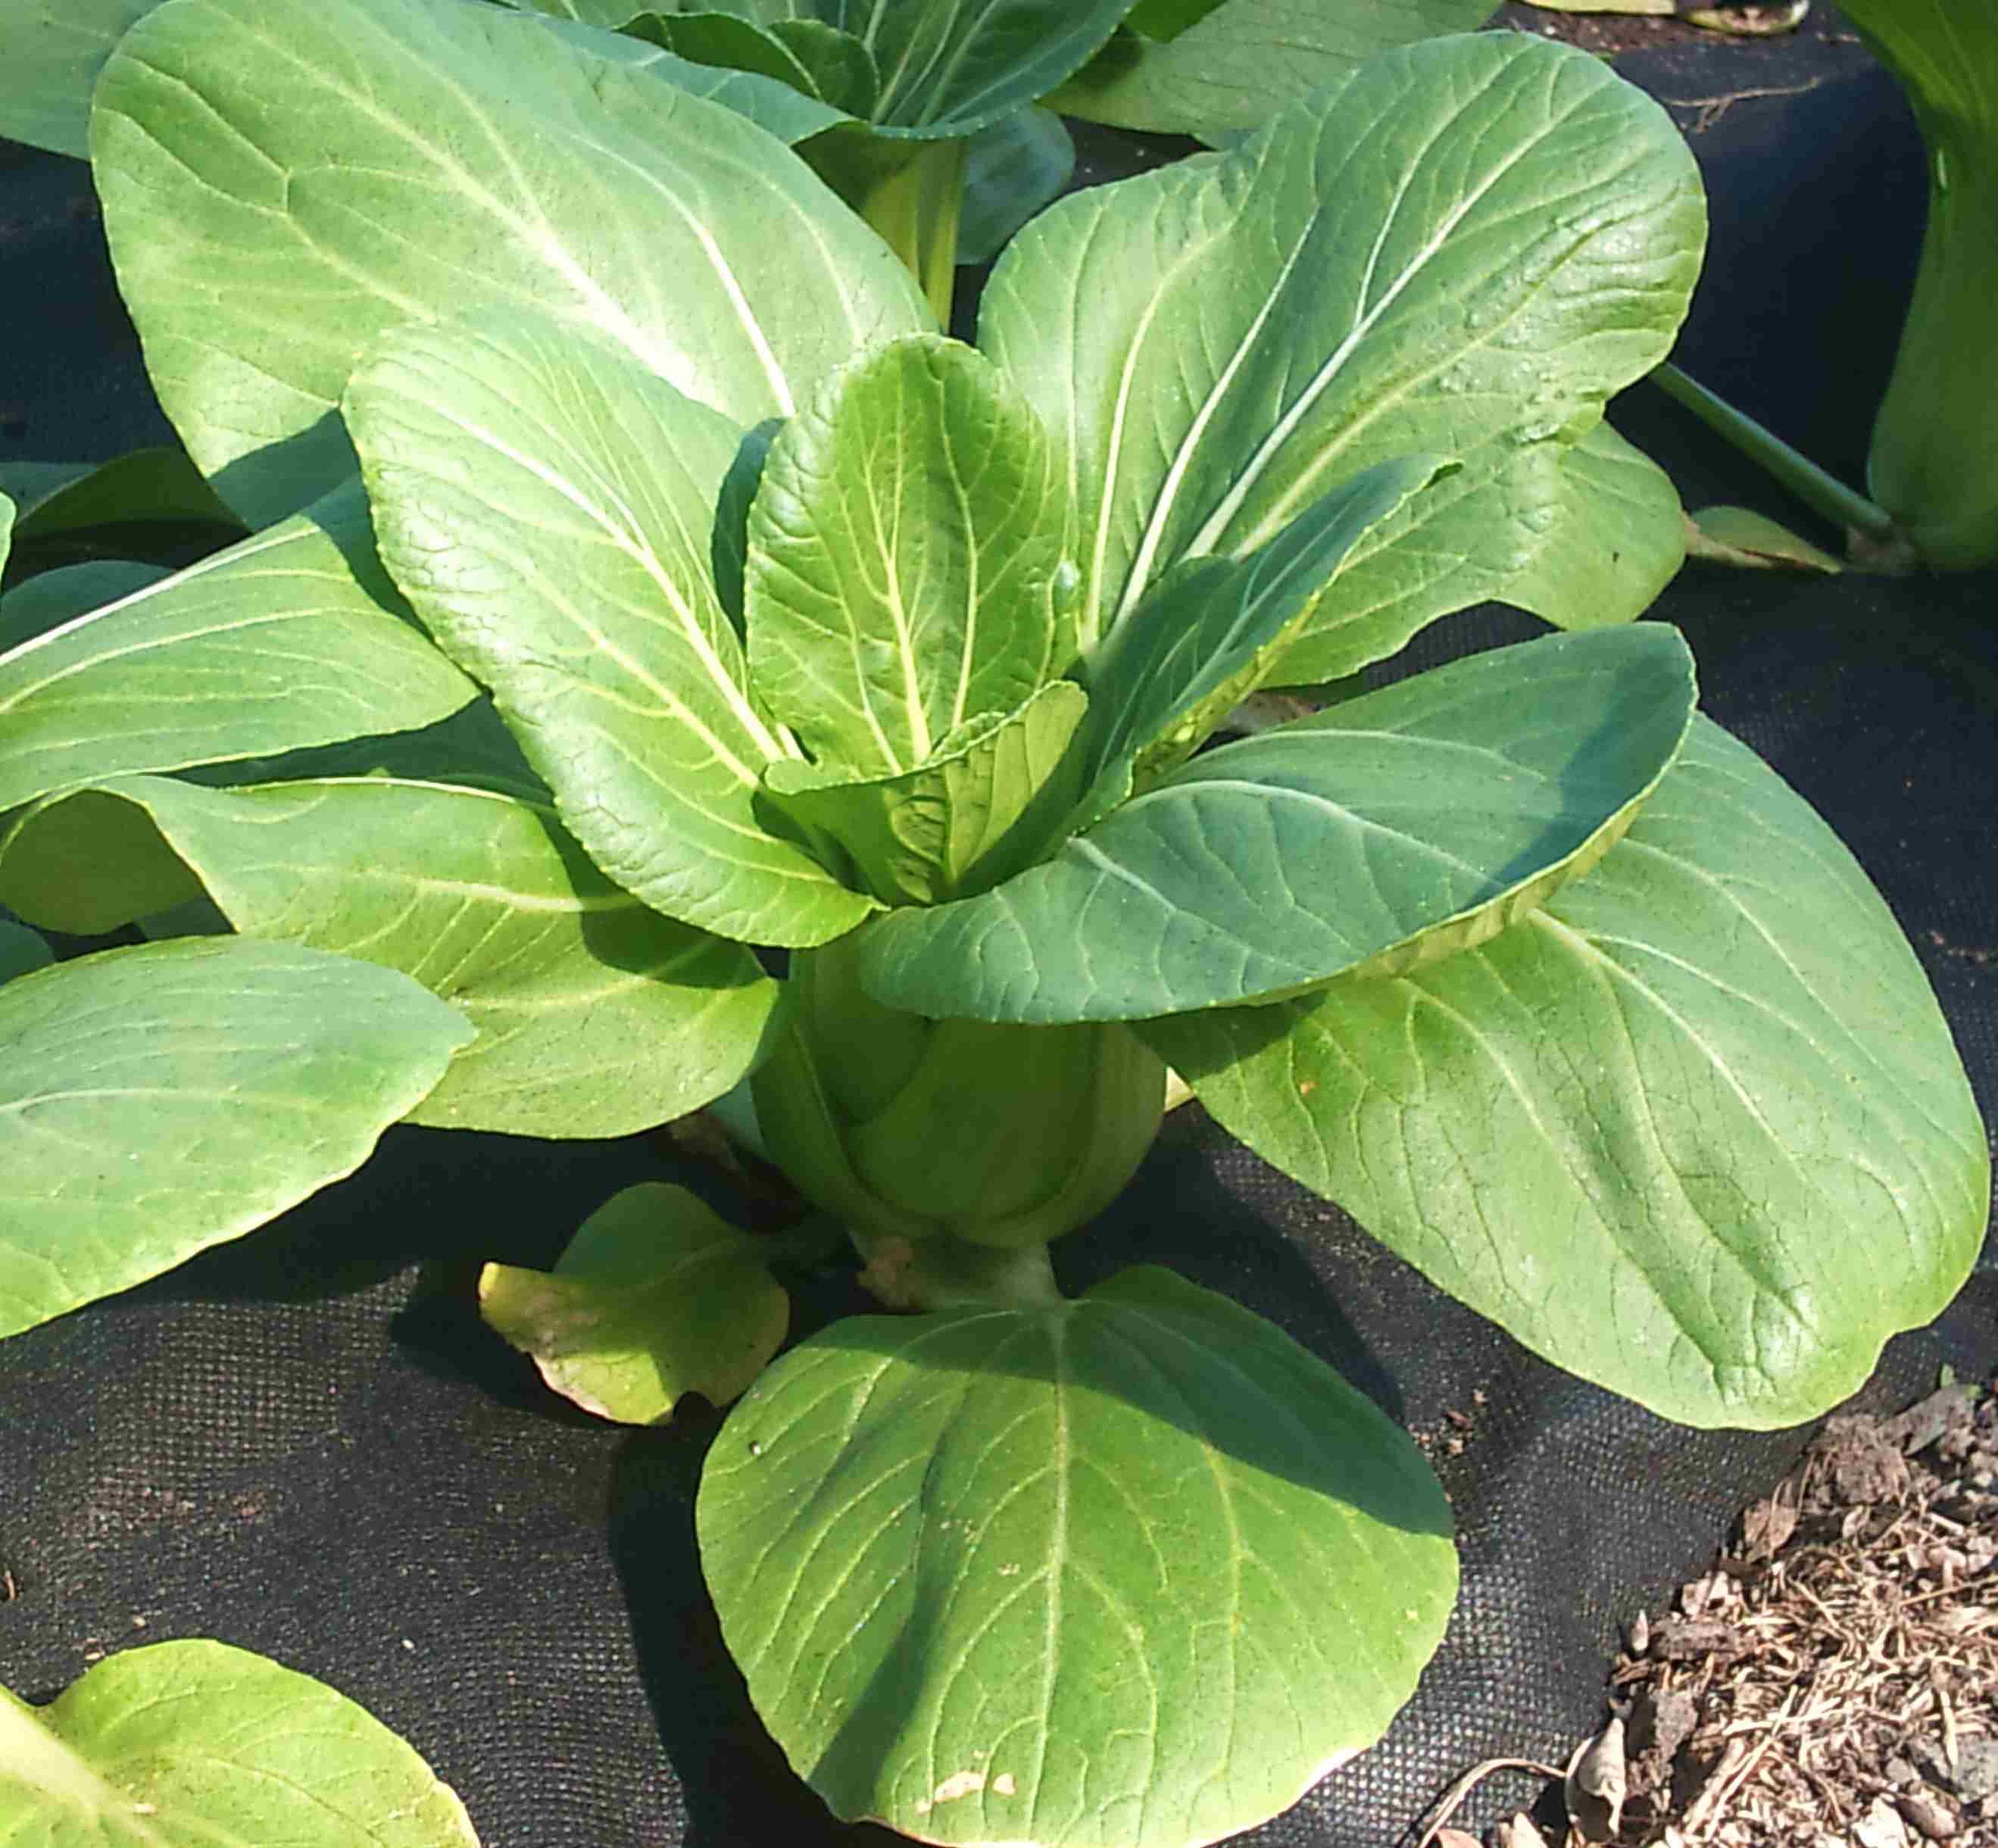
Organic Bok Choy – Supermarket Quality
I have been struggling for years to grow Bok Choy. I would see it in the supermarkets, these perfect little bunches and every time I saw it, I would ask myself, what am I doing wrong?
I know that the Bok Choy in supermarkets is usually grown hydroponically and they spray them with chemicals to kill the bugs, to ensure they look perfect to the consumer. But I figure if they can do it, there must be a way to grow them without the use of pesticides and chemical fertilizers and in the ground so that they still present as well as the hydroponically grown ones.
I have finally figured out how to grow Bok Choy so that it looks fantastic and isn’t all chewed up by insects and covered in dirt.
There are two parts to the equation:
- Keeping the vegetables clean
- Stopping them from being ravaged by caterpillars, grasshoppers and white fly
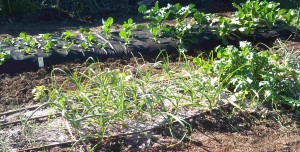
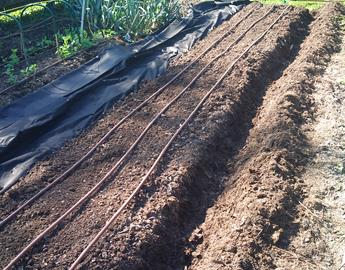
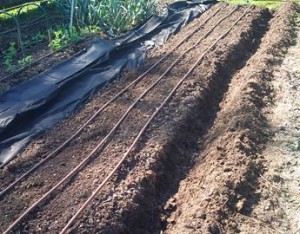
Dripper Lines foreground, Weed Gunnel background
Dripper Lines & Weed Gunnel
To keep the vegetables clean also requires a 2 part approach. Both are inexpensive.
The first is dripper lines, so that you don’t have a hand held hose or sprayers splashing dirt onto the Bok Choy.
The second is Weed Gunnel. This stuff is first class, giving a number of benefits:
- It keeps the garden clean and weed free
- It suppresses insect growth from the soil. Insects can have a number of growth stages and in many cases one stage is as a larvae in the soil. Weed gunnel prevents this stage.
- Weed gunnel helps reduce moisture evaporation.
- In winter it helps warm the soil as a solar collector
- It is biodegradable with approximately 18 months service life.
- It is inexpensive and easy to install.
Installing Dripper Lines and Weed Gunnel
Dripper Lines Installed Ready For Weed Gunnel to be Pulled Over
I dug a trench down one side of the proposed garden bed and piled the soil from the trench up onto it. The Weed Gunnel was laid into the trench and the soil pushed back down onto it. The dripper lines were then laid onto the garden bed, after a bag of well rotted chicken manure had been dug into the bed.
A trench was then dug in the other side of the bed and the weed gunnel pulled over the bed and the
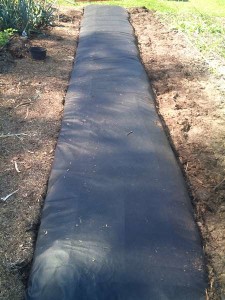
Weed Gunnel in Place Ready For Planting
dripper lines. The finished bed looked quite neat and tidy ready for planting.
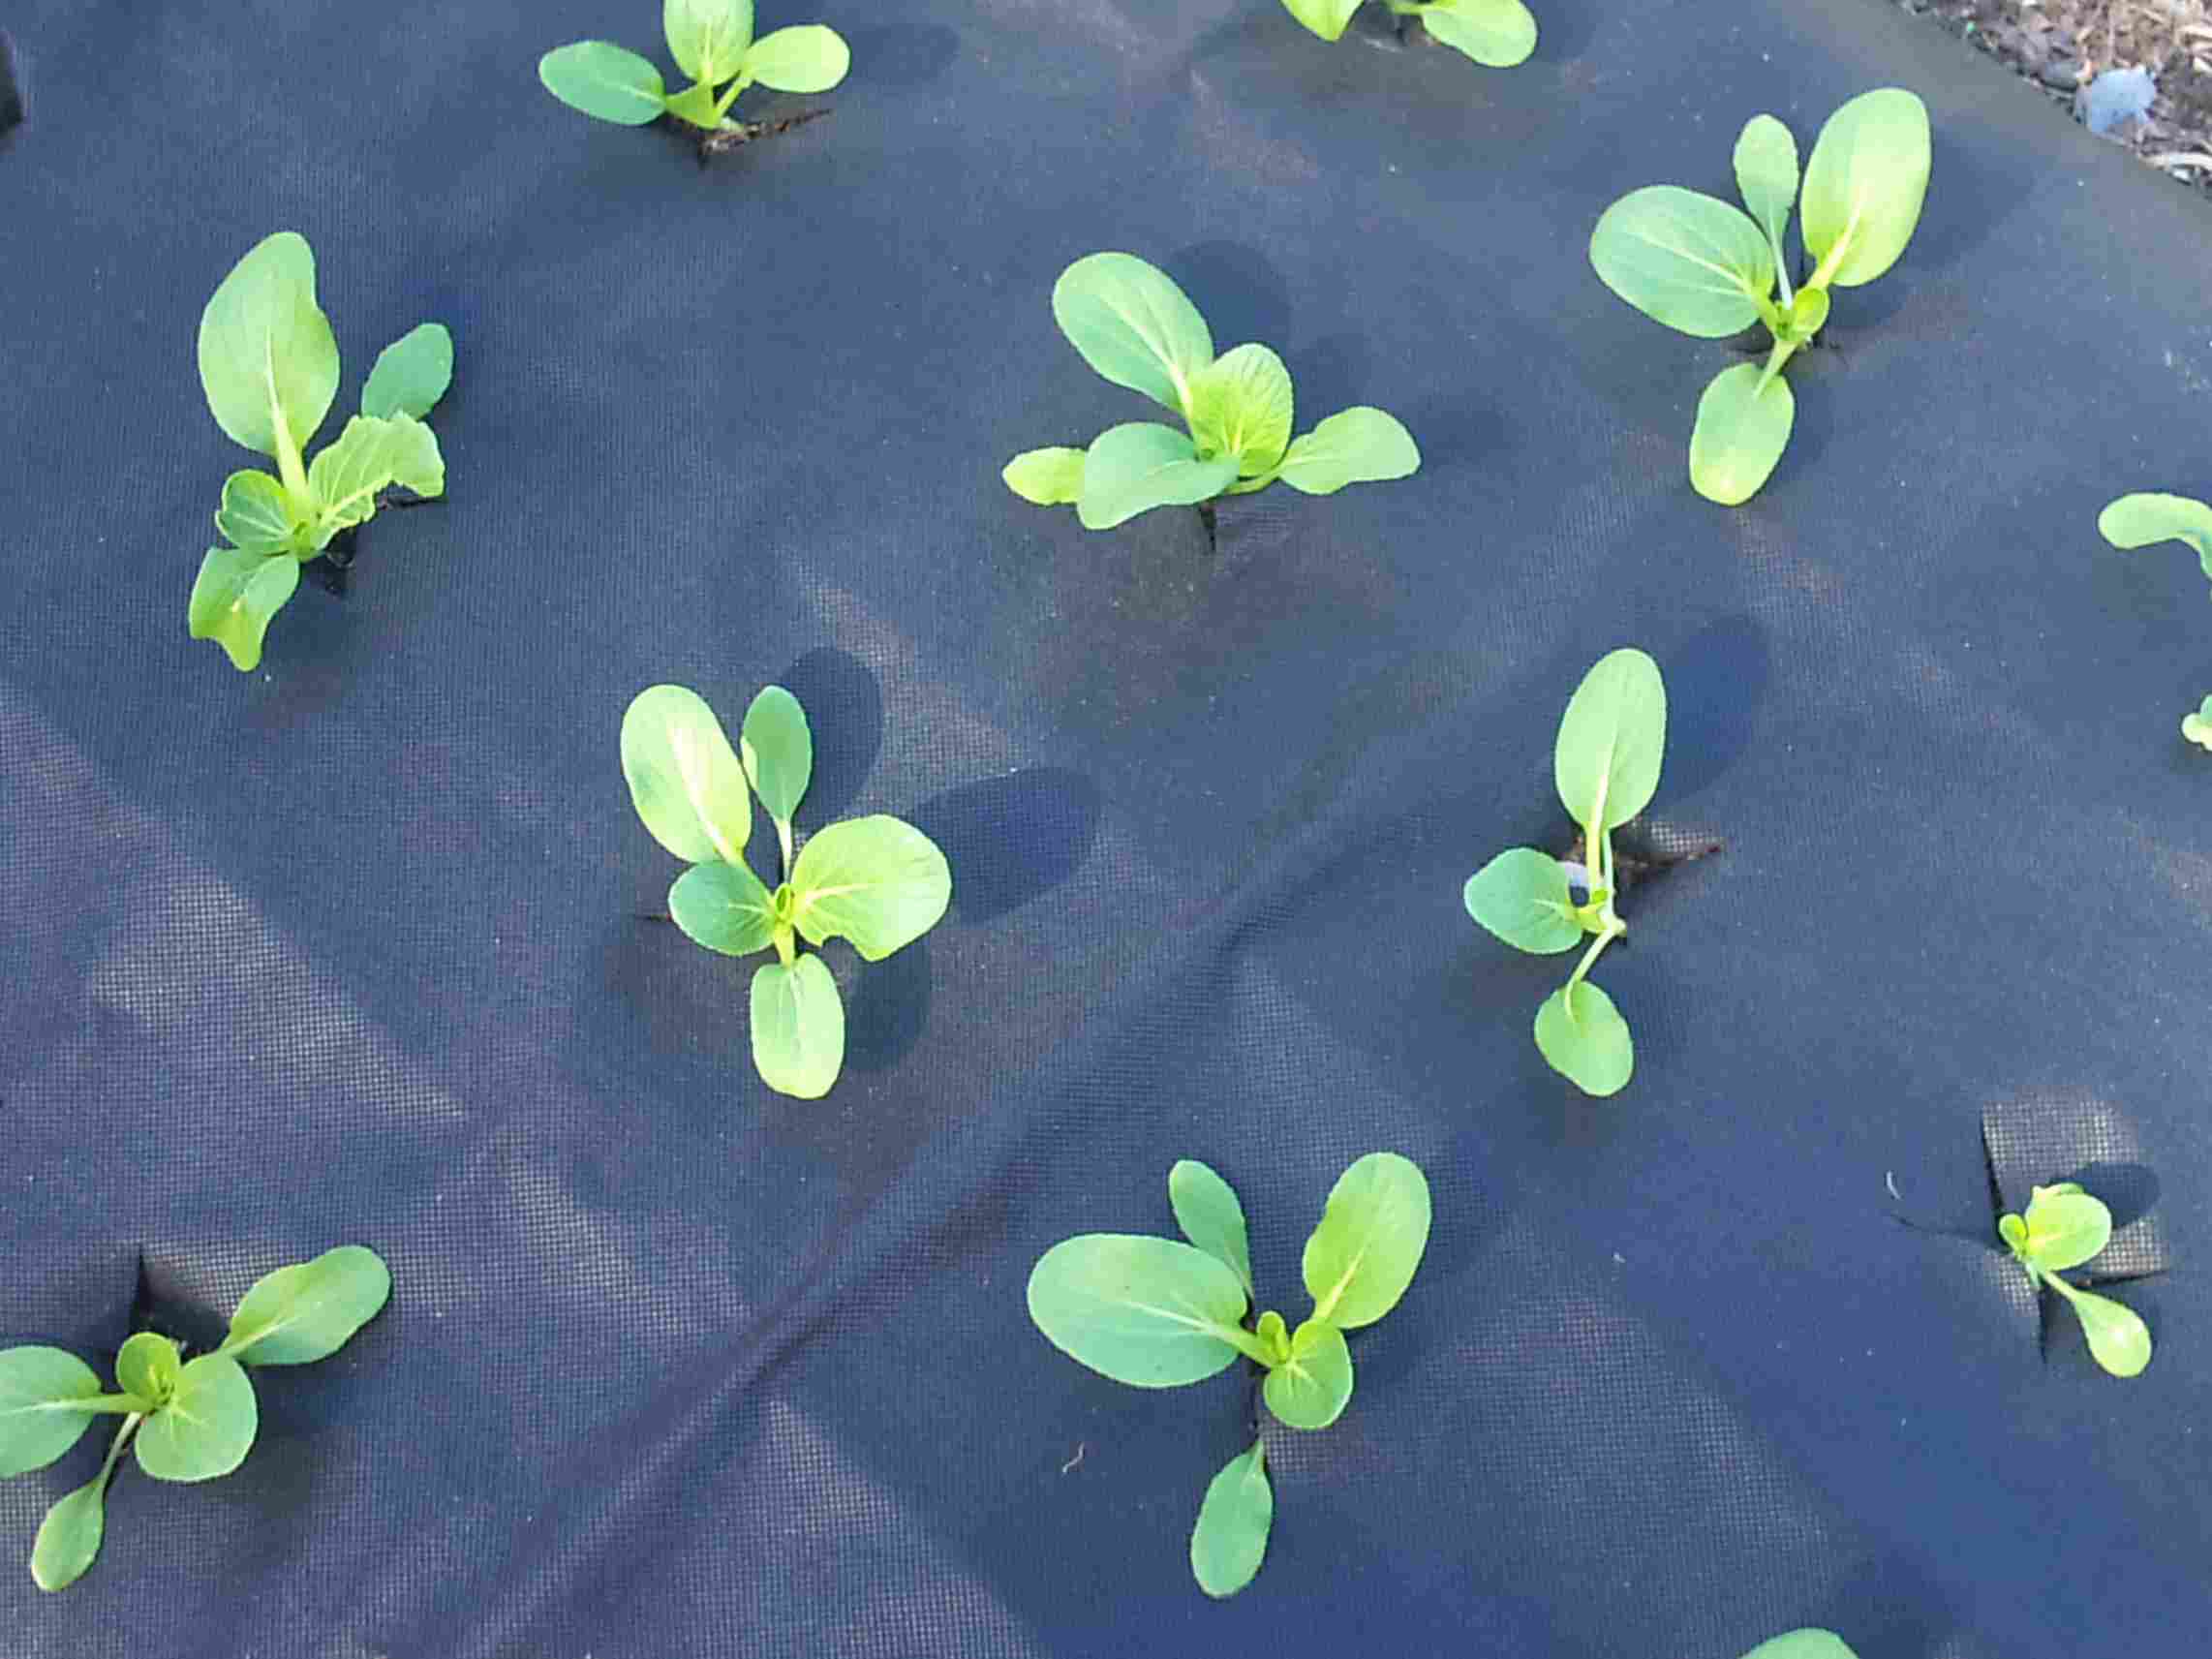
To finish the job, all I needed to do was plant some seedlings.
Part 2. of the plan to grow Organic Bok Choy that looked like it was grown hydroponically was to control the pests without using chemical pesticides. I needed to stop the cabbage moths using the Bok Choy as an egg repository that would hatch into leaf chomping machines. At least I would see them a lot easier on the black weed gunnel with no weeds disguising them.
There was one more trick I had. It is called

Bok Choy Seedlings
Chilli – Garlic spray. To make it, get about 30 of the hottest Chillis you can and a couple of bulbs of garlic. I was fortunate enough to find a friend with some West Indian chillis that must measure about 1 billion on the Scoville scale. They are that hot that my hands were burning after sieving. Next time I will wear rubber gloves.
Place the chillis and garlic in a blender with 2 cups of water and blend for a good while. Sieve the concoction into a 2 litre plastic milk container. Add some biodegradable dishwashing detergent and some vegetable oil. The detergent affects some insects and the oil makes the stuff stick.
Pour half of the mixture into another 2 litre container and fill both containers with water. This is your base solution that you will mix at about 50 ml per litre for spraying onto your plants.
It is best to spray early in the morning or late in the afternoon and start a spray routine as soon as you plant. It is better to prevent the pests from getting established than to try and get rid of them once you find that they are there. I find that a good spray every 3 or 4 days is keeping them under control.
It is very effective against ants, so make sure you spray the soil as well as the plants. Ants try to farm aphids, so keeping them out of your garden is a benefit. I have also noticed that grasshoppers and moths get out of range as quickly as possible when I spray around the perimeter of the garden.
A number of sites I have looked at regarding Chilli Garlic spray recommend using it within two weeks. I have had it stored in the shed for 4 months and it still workd very effectively. I tested some old stuff on ants the other day and it still knocked them over quick time.
Natural Gardening, Vegetable Trials
This is my understanding from a number of papers from rebels in the agricultural science industry. Probably the most well known is William A. Albrecht PhD, Chairman of the Department of Soils at the University of Missouri. He lived from 1888 – 1974 and spent most of his life studying the relationship of soil fertility to human health.
In one of his papers he stated that Calcium is the most important mineral for plant health. Which in turn benefits humans who consume healthy plants.
He did thousands of studies growing all manner of grasses, beans, vegetables and fruit in all types of soils and the only variable he changed was the amount of Calcium. What he discovered was that when the soil reached a saturation point with Calcium, all of the test produce grew better and gave a higher yield. In many cases this saturation level was up to 8 tons per acre or about 17.5 tonnes per hectare. It didn’t matter whether the soil was alkaline or acidic, by increasing the amounts of lime in the soil the growing results improved.
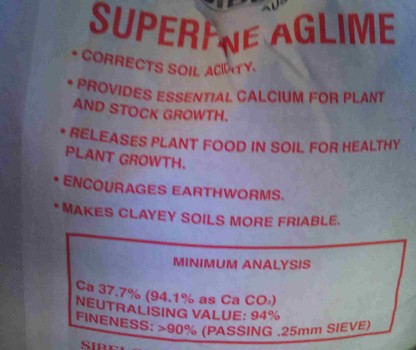
More Lime Please

20kg Bag of AgLime showing the analysis
I usually have a small bag of lime in the shed and always throw some on before planting and every time I dig the garden over. But reading about Albrecht again and also one of his comtemporaries, V A Tiedjens, I got that stirred up I went and bought a couple of bags of lime to increase the calcium in the soil.
As you can see from the analysis there is quite a good amount of Calcium. Because it comes from limestone it doesn’t get used quickly and builds up in the soil. The conventional use for liming is to raise the pH of the soil. On the east coast of Australia we have soils described as acid sulphate and lime is used to bring the soil to a more neutral pH as close to seven as is possible.
Little did our farmers know that the pH balancing was not the greatest benefit they were getting from liming the soil. The increase in calcium and its availability to the crops they were growing was the biggest benefit.
The short description I have given here regarding Albrecht’s work does no justice the years of research he undertook and the derision he received for his views and tested opinions. The biggest scoffers at his results and writings were fellow scientists whose research was paid for by the agricultural chemical companies. They were closely followed by the agronomists working for the chemical supply companies. They were heartily unimpressed by another upstart stating that NPK wasn’t the be all and end all of plant nutrition. If farmers started to believe Albrecht where would their fertilizer sales be?
Soybeans and Lime – See the previous post regarding the protein increase in Soybeans from liming before planting.
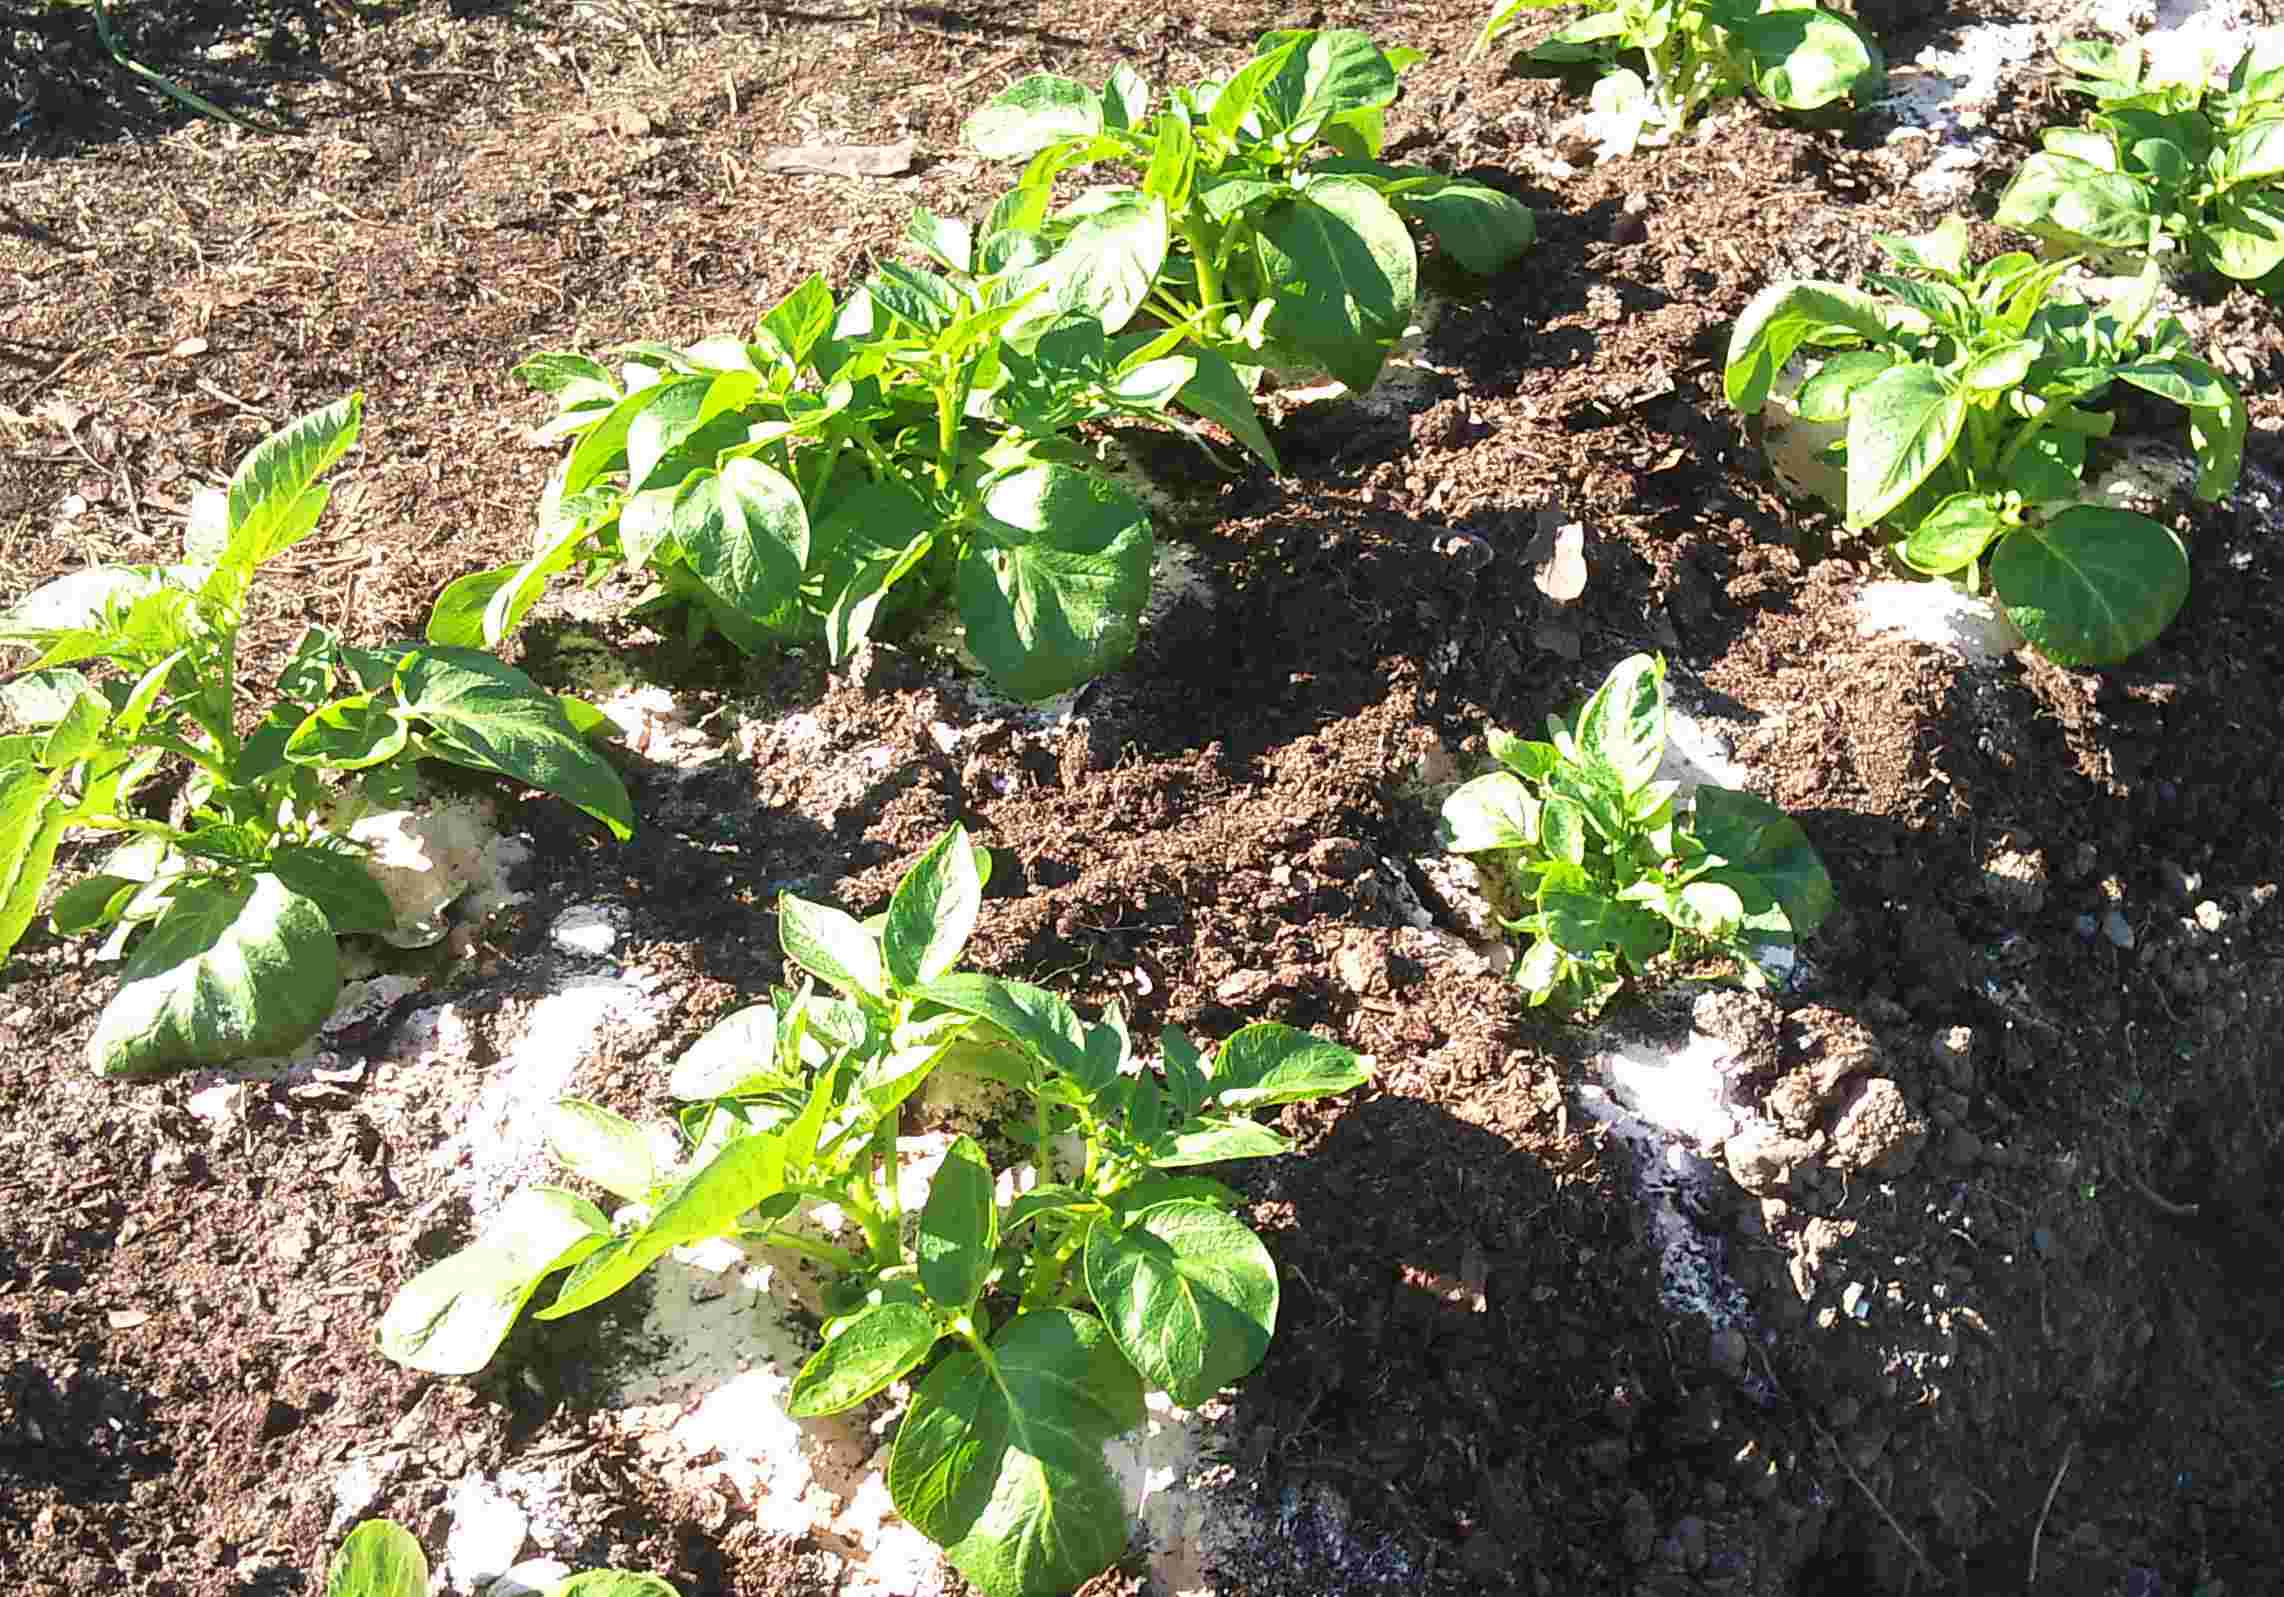
Potatoes

Lime around potatoes planted 1 month ago exactly
These were planted a month ago and I have just started to add compost to hill them up. The white stuff around them is lime. I am curious to see how much better these potatoes do than the ones grown in the cardboard cylinders in a previous post.
Difficult To Decipher
Here’s a link to one of Albrecht’s papers. http://www.soilandhealth.org/01aglibrary/010143albpap/ph.balanced{cd07be7979728a86b172d4c3c193ee8254293b2598ced4c874c66a7b3dbba444}20nutrition/ph.bal.nut.htm I guess a lot of people have found them pretty hard going. He definitely didn’t write them to receive a Pullitzer. If you take your time you will see all the evidence he collates for his assertion that Calcium is the chief plant nutrition.

It takes a while for the alternative points of view to mainstream thinking to take hold. On many occassions these rebel thinkers like Albrecht and Tiedjens must have sustained their beliefs by studying other radical thinkers like inventors and scientists who had an idea that everyone derided. Maybe they looked to Copernicus and Galileo for inspiration. Whatever moved them to hold true to their beliefs is now starting to benefit the rest of humanity. Slowly Slowly.