Alternative Thinking, Natural Gardening, Vegetable Trials
Do you find that when you plant your vegetables from seed directly into the garden, you get too many plants come up and you have to cull them? Isn’t it difficult to throw those young seedlings away? I find that I am always looking for a spot to transplant them to.
Those little seedlings are just getting started when you are supposed to euthenise them. What started as a small job ends up taking a couple of hours.
The solution to the problem.
The Permaculture Home Garden Book by Linda Woodrow
The solution comes from a book titled “The Permaculture Home Garden”. Ordinarily I don’t read books about Permaculture because the ones I have looked at are mostly about design. I am more interested in what to do. I know design is important, but I just want to grow stuff.
Well this book is brilliant and what’s more it is written by a woman. Now don’t take that sentence the wrong way. I have tried reading numerous books by female authors and for the life of me I usually can’t get interested in them. There have been a few exceptions and this is one of them. It is full of down to earth information from building chook domes to making a seed raising mix.
Seed raising mix recipe
Materials for the seed raising mix
The simple recipe is a 50/50 mix of compost and coarse river sand. If you have read my posts on Calcium, you will know that I am a big fan of getting calcium into the soil. I also like to put it into my seed raising mix.
My formula is 3 cups of sieved compost, 3 cups of coarse river sand and 1 cup of lime. The seeds sprout a treat in this mix.
Part 2 of the equation
The second trick is to grow your seedlings in a bottomless container so that you can direct plant the advanced seedlings and pull the container up for protection for the seedling as it settles in.
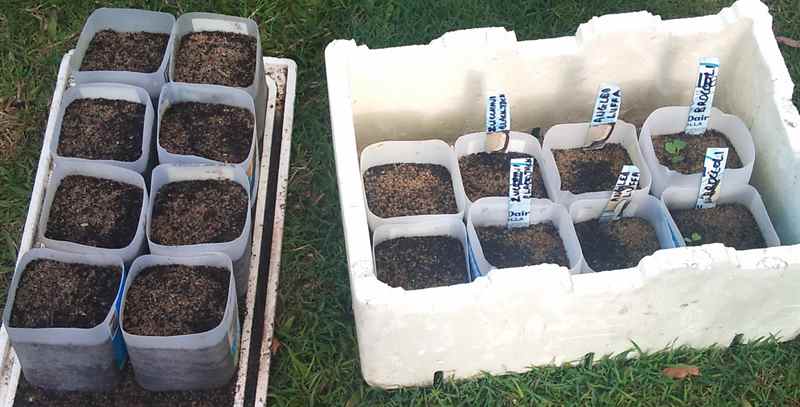
Pots to raise advanced seedlings in.
It settles in much quicker than if you grow a seedling in a punnet and have to remove it to transplant. The seedling suffers from transplant shock and takes a minimum of two to four weeks to recover.
The cheapest and easiest way to create bottomless containers is to cut the tops and bottoms off two litre milk containers.
By raising your seedlings this way, you don’t grow too many and you have an inexpensive supply of pots so you can be raising your advanced seedlings when your existing crop is half finished.
It also solves the other problem of having too much of the same vegetable at once and then not having any. Your planning is much easier
Vegetable Trials
It’s a lot different growing outside in the backyard than in green houses or glasshouses. In a controlled environment you can regulate the temperature a little, ensure optimum watering efficiency and being enclosed stops the entry of a lot of insects.
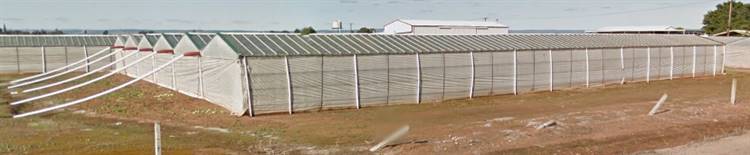
Old Style Glass Houses
It is a lot easier to monitor pest pressure and respond to it. Perhaps the hardest to guard against is spider mites and western flower thrip.
When I was growing organic tomatoes, cucumbers, capsicums and egg fruit, there was no need to worry about creating a micro-climate or wind protection. In a glass house that came with the territory.
I also didn’t worry about growing from seed. It was far better to have a nursery grow my seedlings than worrying about raising 2500 tomato seedlings and then looking after them for six months.
Get Some Satisfaction
But now there is no better satisfaction than growing some vegetables from seed, then saving some of the seeds from that crop and growing that vegetable the following season.
I have planted broad beans for the last two years and last year I saved some seeds by shelling the beans and drying them. I then left them wrapped in paper towel in an ice cream container.
100{cd07be7979728a86b172d4c3c193ee8254293b2598ced4c874c66a7b3dbba444} Germination
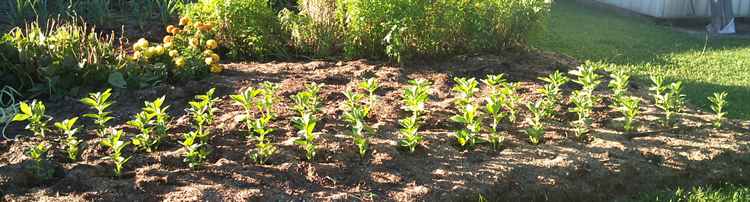
I planted 40 broad bean seeds two weeks ago. I wasn’t sure how long they would take to sprout, so this time I wrote it down in a gardening log. I planted on the 12 April and the first sprouts appeared on 21 April. By the 24 April there was 100{cd07be7979728a86b172d4c3c193ee8254293b2598ced4c874c66a7b3dbba444} germination with 40 small broad bean plants underway.
100{cd07be7979728a86b172d4c3c193ee8254293b2598ced4c874c66a7b3dbba444} germination from saved seeds
One Small Step To Self Sufficiency
Being able to save my seed and regrow them the following season means I am independent and self sufficient. The other benefit is that I am growing a broad bean that is becoming adapted to my locality. Hopefully with some experimentation like best time to plant, watering frequency, whether to mulch or not I should be able to improve the yield. But then again, you can only eat so many broad beans and with forty plants, I will have more than enough for us and the rellies, work mates and Uncle Tom Cobbly.

Vegetable Trials
In the sub-tropical garden, winged beans are a good alternative for squash and zucchinis. They aren’t affected by powdery mildew and are quite easy to grow.

Small crisp pods that snap easily are the best for cooking
Trellis Needed
Winged beans need a trellis. The ones I am growing self seeded from a vine I had in last year, which I originally grew from seed.
Last year I didn’t write any notes about the time it takes for the vine to grow and for flowers to appear. This one self seeded. The vine come up in early Spring after the ground temperature had risen. It is in a great northerly facing location growing up the side of the carport. I strung some wire from two of the posts to give the winged bean something to hang onto.
The Green Wall
Over the spring and summer the vine grew and grew, practically making a green wall on the carport. But no flowers. I was starting to think that it was like one of those sterile passionfruit vines that don’t even produce flowers.
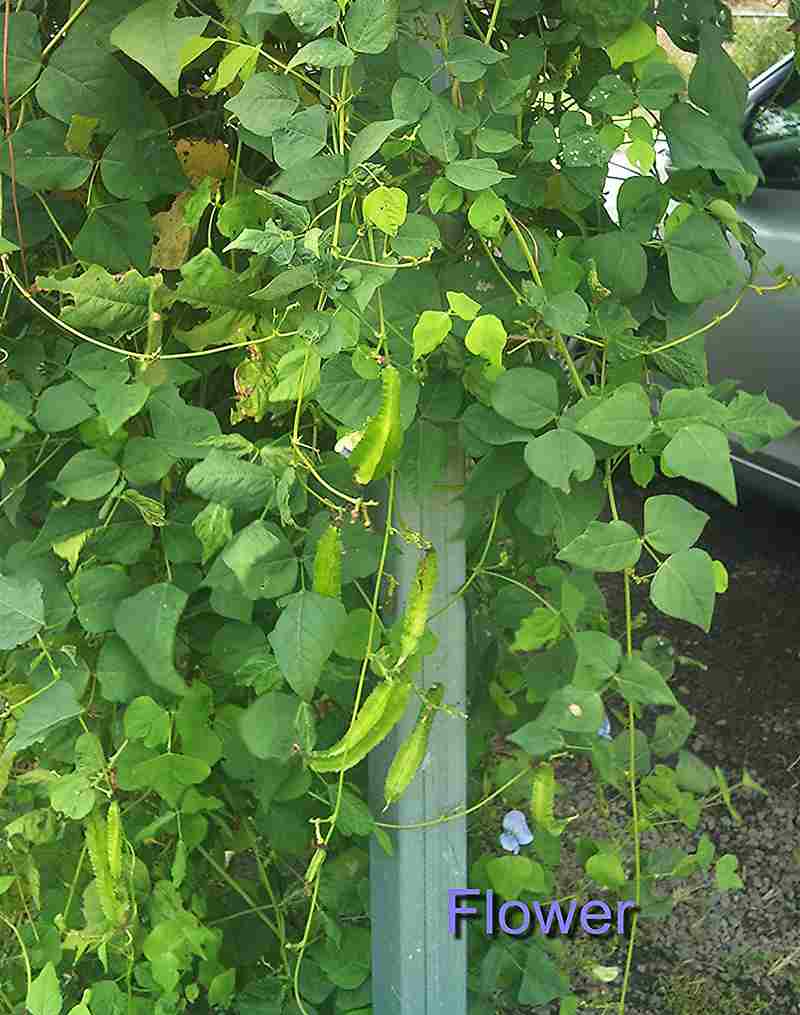
Part of the green wall
Finally some Winged Bean flowers
March heralded the arrival of the flowers. It only takes about 5 days from flower to picking the pods. Pick them when they are small and crisp. If you let them get too big they become hard and tough.

The flowers don’t last long but look good while they are there
Winged beans fruit prolifically and we have been enjoying them for 5 – 6 weeks now. There are bags of them in the crisper and friends have been receiving them as well.
Now that the night time temperatures are cooling, I have noticed that they take a little longer to flower and mature.
Cut them into bight sized chunks and and stirfry for a couple of minutes with garlic, ginger and soy sauce. Great as a green vegetable substitue.
Natural Gardening, Vegetable Trials

Garlic varieties take different time lengths to sprout
Since planting the garlic I have learnt a few things so it is time for a garlic update – see Planting Garlic – Four Varieties
Originally when pIanted the garlic, I thought they would all sprout at around the same time and that sprouting would only take 4 -5 days from planting. This was my experience from previous plantings. But previously I had only planted garlic from Woolies, so my experience was probably with only one variety.
From looking at the previous post I planted the garlic on either the 21 or 23 March. The Glen Large sprouted in 4 days. It is now the 7 April and the Silver Skin is just starting to poke through, which makes 14 – 16 days to sprout. There is no sign of the Elephant Garlic yet.
It has eased my mind a bit, as I was starting to think that the winterising (putting in the fridge for 6 weeks) had affected the garlic that hadn’t sprouted. I put in a call to Green Harvest where they quelled my fears by saying that some garlic can take up to 6 weeks to sprout.

Silver Skin Garlic Poking Through after 14 – 16 days
In case you are wondering, the grass clippings beside the bed are on the walkways through the garden. I use the walkways for trench composting. At various times throughout the year, I will place all the composted material from the trench walkways onto the garden beds. I will then refill the trenches with whatever material I have, from fresh lawn clippings to semi-composted clippings and other composted material. I will also throw in some crusher dust and lime.
The lawn clippings should also generate some heat as they compost which will be welcomed by the plants as we head into winter.
If the lawn clippings have been there for a while, I will also use them as mulch and to help suppress the weeds. I don’t worry that they are a bit water repellant as the dripper lines are under them in the garden. When it rains heavily in Brisbane, it doesn’t matter how water repellant a material is it still gets soaked.
Further Update 9 April 2015
Woohoo, the Elephant Garlic has made an appearance. Two cloves of the five planted have poked their nose through. Looking forward to the rest appearing. The sprouting times are now Glen Large and Woolies garlic around 4 days, Silverskin garlic 14 – 16 days and Elephant garlic around 18 days.
Vegetable Trials

Hog wild – talk about Jack and the Beanstalk
Although this stuff is easy to grow and also gives a good harvest, you have to have an acquired taste for it. I know there are millions of people in places like India and the south of the USA, Vietnam and other tropical Asian and African countries. To me, it ranks with tripe, at the bottom of the food chain.
Sure you can add it to salads and curries and gumbo, but it is slimy and tastes like shite.
I was at Bunnings and saw a couple of guys from the sub-continent looking at some Okra seedlings. I had grown it before but never eaten it so I needed to see what would happen. The last time I grew it was in South Australia and they were picked by a Vietnamese friend and prized. I was happy that someone enjoyed them.
The climate in Qld is the opposite to SA. It rains in summer here and winter in SA. They have very hot dry summers, here has hot humid summers with most times a lot of rain.
So I bought a couple of different types, took them home and planted them.

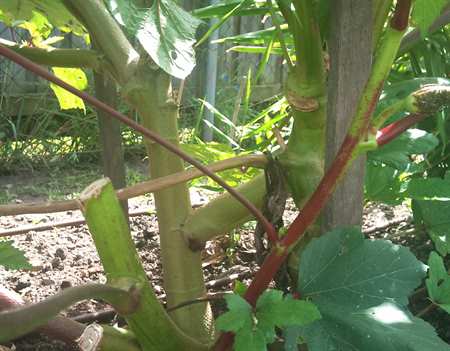
I had to remove some branches 2 months after planting
Okra pruning required
Boy can they grow. Before long, it looked like I was growing a couple of trees in the middle of the garden. They were out of control. They were in a bed that I had previously grown mung beans, so I was wondering if they had an affinity to the root dwelling bacteria that beans attract. These bacteria live in nodules in the roots and convert nitrogen from the air into a form that feeds the plant. In return the plant excretes a sugary substance from its roots that feed the microbes.
They started producing fruit after a flower appeared for at most a day before closing again. Being me, I thought the bigger the better. Wrong, I had to pick them early, when they were no bigger than my pinkie. After that they started to go fibrous and woody.

Beautiful Flower, open for a day and plenty of fruit but only edible when tiny. The small one is the right size
Okra in a Curry
So we tried some in a curry and both of us thought it was nothing to write home to mum about. In fact it didn’t rank for taste or texture. I am willing to admit that we don’t know how to cook it or present it.
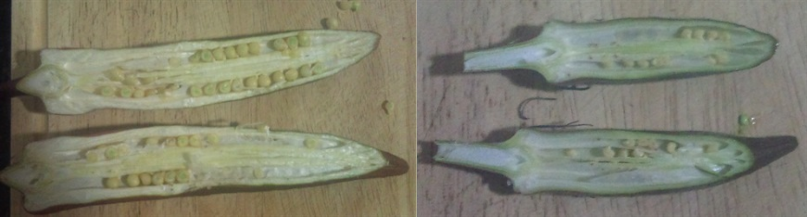
Large Okra left, small Okra right. Cut in half. The bigger the seed the more mucousy substance in them and the more fibrous the pod.
Armed with this thought that I didn’t know enough about it, I was on the lookout for a neighbour who is Indian. I’d never met them so the next time I saw them outside, I was in the garden. I cut off a couple of the fruit and jumped a couple of fences to say hullo and get some knowledge. Unfortunately I had collared mother or maybe grandmother, who didn’t speak any English. She must have been wondering who this crazy old bloke was that jumped the fence and was waving some Okra in her face.
After about 30 seconds, she grabbed the Okra said thank you and disappeared inside. I haven’t seen an appearance of the neighbours two doors up since. So I am no wiser to the attributes of Okra.
About the only thing of value that it was doing was shading the ginger. We have had a very hot summer and the Okra was helping the ginger by shading it.
When Autumn arrived, I made the grand decision to remove the Okra, It wasn’t as difficult as I imagined it would be. I cut it down to size with my Silky Sugoi and pulled it out.
My original supposition was correct. The roots, which were quite long but set shallowly were covered in nodules. They were not nematode nodules as the plant was way too vigorous. I chopped off all the roots and buried them back into the garden. Unfortunately I didn’t think to get a picture of the nodules and I don’t think I will be growing Okra again, just for the chance of taking a picture of the nodules.
To give you an idea what the bacteria nodules on a root system look like go to this post Soy Beans and Nitrogen Fixing Bacteria
I know that I am ignorant when it comes to Okra. If you feel that I need enlightenment, I am ready to listen. Leave a comment or a recipe, I am only too pleased to try it out and maybe change my opinion.
Cheers Olman
Natural Gardening, Vegetable Trials

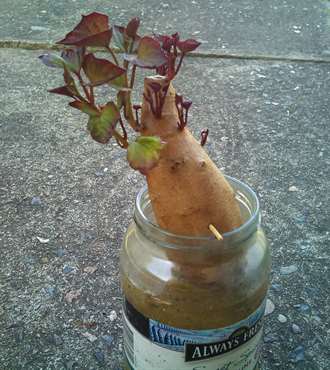
Push toothpicks into the Organic Sweet Potatoe and suspend in water
For quite a while I avoided growing sweet potatoes. It seemed too much like hard work. First you had to get a sweet potatoe to shoot vines and them you had to take the vines off and plant them.
After getting on to YouTube and seeing how you get the vines (called slips) to grow, I decided to have a go and see what turned out.
Once you have sweet potatoes in the ground, unless you are pretty careful, you will have them for life. They are like a weed and will take over the place. It would be pretty difficult not to get a crop. I have beans where the sweet potatoes were and am still pulling out vines shooting through the soil. Admittedly I am talking about the gold or orange coloured ones. I didn’t have as much success with the purple ones. Got more vine than potatoe.
The following paragraph is from Wikipedia http://en.wikipedia.org/wiki/Sweet_potato
The plant is a herbaceous perennial vine, bearing alternate heart-shaped or palmately lobedleaves and medium-sized sympetalous flowers. The edible tuberous root is long and tapered, with a smooth skin whose color ranges between yellow, orange, red, brown, purple, and beige. Its flesh ranges from beige through white, red, pink, violet, yellow, orange, and purple. Sweet potato varieties with white or pale yellow flesh are less sweet and moist than those with red, pink or orange flesh
Growing the slips
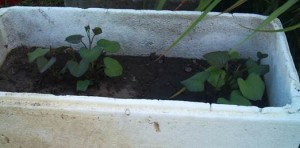
An old styrofoam box, some dirt and an Organic Sweet Potatoe. Just add water
As with most things tried for the first time, I tend to take too much care of the plant. With sweet potatoes they are bloody near impossible to kill, no matter how poorly you look after them. The easiest way I found was to throw some soil into a styrofoam box with a couple of drainage holes in the bottom. Water and wait for the slips to appear. I tried another way with the tuber suspended in a jar of water, but the ones in the dirt grew much quicker. Slips from both were planted and both ways produced a great harvest.
Finding a Source of Slips
The easiest way to start some slips is to buy a couple of Organic sweet potatoes. The ones in the supermarket have an inhibitor sprayed on them to stop them growing. The organic ones will start gowing slips all by themselves when the temperature starts to warm and the hours of daylight increase toward spring, depending on temperature. In that way they are similar to potatoes.

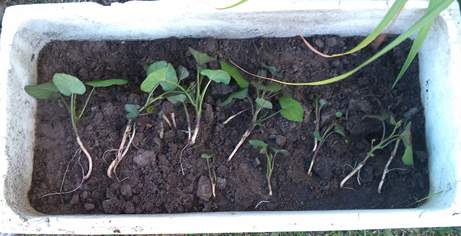
Just pull the slips off at the tuber and plant. So easy
Planting Out
When planting, it is better to pull the slips off the potatoe and plant them in the soil. In the bed I grew the tubers grew vertically down into the soil and the vines wanted to take over the rest of the garden. The garden bed was dug
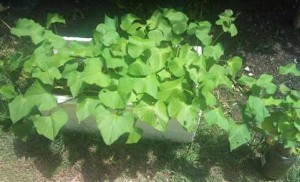
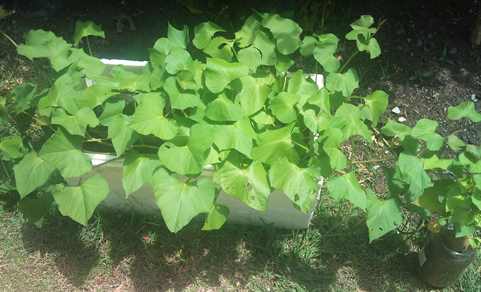
The slips just keep on growing. Slips in jar and dirt three months later
over pretty well and there was a fair bit of compost dug in. At least four times during the growing period, about 6 months where I am, I got out the hedge clippers and cut back the vines.
Harvesting
I found the easiest way to harvest was to pull up the vine and find where the tubers were. The vine leads back to the tuber where there were between 4 – 8 tubers. Some of the tubers were quite big and weighed over 2kg each. The majority were around 400 (1lb) to 800gms (2lb). The harvest was in excess of 150kg and the neighbours and friends were well supplied.
I still have about 40kg of sweet potatoes stored in the shed and it is now the middle of winter and 3 months after harvesting them. They go well in the slow cooker in a beef casserole and make a great sweet when cooked very slowly for a couple of hours in a sugar syrup.
And they make great chips. Cut thinly, put a small amount of olive oil in a baking dish, rub the slices in the oil. Grind some rock or sea salt over and bake in the oven for around an hour at about 200C. You need to check every now and then, move them around a bit and rotate the dish and ensure they don’t burn. You just want them crisp.