
Natural Gardening
Three levels of growth, aerial shoots, rhizome and tubers
I harvested some Yacon the other day and was quite surprised when it actually tasted like the descriptions I had read. The tubers taste something like a Nashi pear, a little sweeter and more fluid but a crunchy texture. We put some in a salad and I was picking the pieces out, they were that tasty.

Yacon is a part of the sunflower family. Spikes can grow to 2 mtrs with small daisy like flowers
The plant takes 6 – 7 months to reach maturity. After flowering top growth withers and dies back and the tubers are harvested. They resemble dahlia or sweet potato tubers, on average weigh about 300 g but can weigh up to 2 kg. Once the soil starts to heave at the base of the plant, dig around to ‘bandicoot’ a few early tubers to extend the harvest season. The tubers continue to sweeten as the plant dies back so the main harvest should only take place once all the top growth is dead, usually by May. Don’t leave it too long though, especially in areas that have mild winters, as the plant will start to shoot again as the weather warms up and the days get longer. The plant needs to be dug carefully to avoid damage to the crisp tubers. After separation from the central stem undamaged tubers can be stored in a cool, dark and dry place with good air circulation for some months. The average sugar content of the tubers increases during storage because of starch conversion. They can also be exposed to the sun for up to 2 weeks to accelerate the sweetening process.
My Yacon Yield
The yield was not huge for the size of the plant and the reproductive part, which is a perennial rhizome looking a bit like ginger. The rhizome grows near the surface and sends out large aerial shoots that eventually produce a tiny yellow flower.
Underneath the rhizome the Yacon produces the tubers. This is the part that is of value to the people who grow it.
The Yacon is a native of the Andes from Colombia to northern Argentina. This could be why the harvest wasn’t as prolific as suggested as I am growing it in Queensland.
According to Wikipedia: Yacón can easily be grown in kitchen gardens in climates with only gentle frosts. It grows well in Kathmandu, Nepal and southern Australia (including Tasmania) and New Zealand, where the climate is mild and the growing season long. It does not grow well in New South Wales, Queensland, or Northern Territory.

Yacon rhizome, looks a bit like ginger
In this picture you can see the perennial rhizome below the aerial shoots and below the rhizome are the tubers. The location I had them growing wasn’t the most fertile in the garden. This year I will create a very fertile location with plenty of compost and see if they give a better harvest.
Health Benefits
Like all new crops and crops that are not well known there are amazing claims of health benefits. The one that I can see as being of interest is the benefit for people with Type 2 diabetes. From Wikipedia Until as recently as the early 2000s, yacón was hardly known outside of its limited native range, and was not available from urban markets; however, press reports of its use in Japan for its purported antihyperglycemic properties made the crop more widely known in Lima and other Peruvian cities. Companies have also developed novel products such as yacón syrup and yacón tea. Both products are popular among diabetics and dieters.
Uncategorized
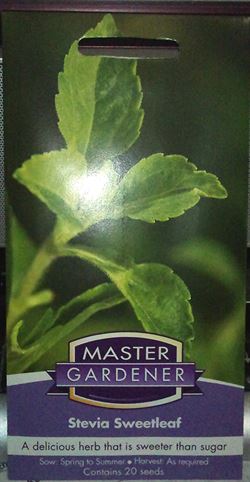
Front of the seed packet received from Mr Fothergill’s Seeds
You may recall that I was trying to grow some Stevia from seed. See this post on Stevia. I was using a seed propagating cup from Mr. Fothergill’s Seeds that they had marketed for children as the Lolly Plant.
I followed all the directions and made sure that I didn’t over water but no sign of seed germination. After about a month I sent an email to the seed company.
Hi, I purchased a couple of the lolly plant growing kits and have had no luck getting the seeds to sprout or grow. They were planted on April 29. I write a bit of a blog and what I did is noted here.https://farm54.com/stevia I haven’t overwatered. The temperature is still quite warm here so I was wondering if you could give me a few tips and maybe send some more seed so that I can have another crack at it. cheers
Prompt reply from Mr Fothergill’s Seeds
We are sorry to hear about your recent disappointment with our Stevia (lolly plant seeds); given you seem to have done everything correctly, its difficult to know exactly what may have gone wrong.
We will arrange to send you some fresh seed to try again.
Regards
Allison
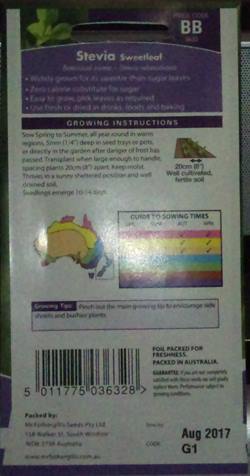
The back of the packet shows that the seeds should be sown in Spring and Summer Brisbane
I received the seeds about a week ago and I noted on the back of the packet the recommended sowing time in the blue area is Spring and Summer. It may have been too cool or the wrong amount of light in Brisbane to make the seed germinate. There are 20 seeds in the packet. I will have another go at germination after the Winter Equinox on the 22nd of June and if that fails, will wait for Spring to try again.
I was quite impressed with the response and interest shown by Mr Fothergills Seed’s.
Wicking Beds
Over the weekend I finally got motivated and completed the construction of the hugulculture wicking bed and frame for the pest exclusion material. I have been a bit handicapped lately with lower back pain. I wrote about that here lower back pain. This post will be mainly pictures and a few comments so you should shuffle through it pretty quickly.
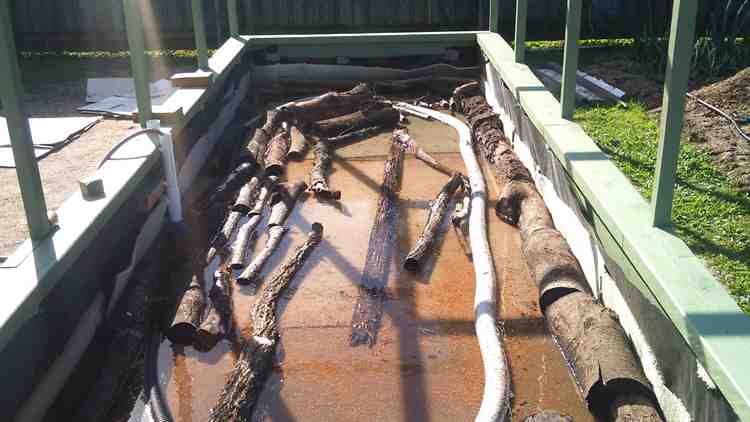
Testing the hugulculture wicking bed for leaks
The bed didn’t appear to leak so I started to carefully place the wood in to create the hugulculture effect. The carpet below the plastic and above it helped with protection, I am sure.
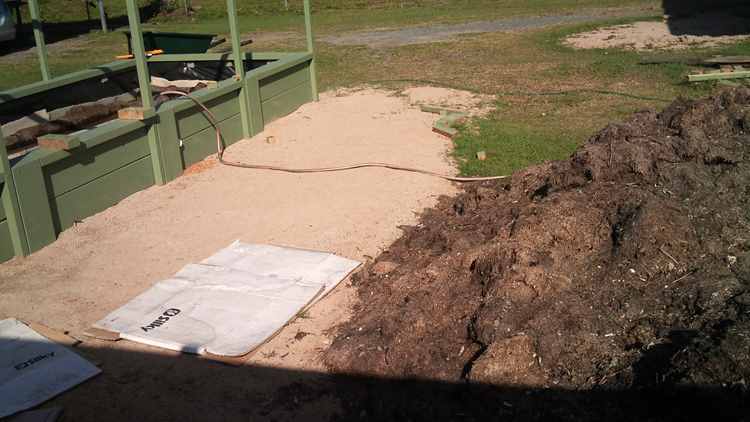
The next job was to move the compost
After adding the wood, the next job was to move the compost. When Gino was preparing the site with the skidsteer, he moved about 6 cubic metres of compost to this position close to the bed. It made it a short trip for each barrow load.

At the halfway filled mark I added lime and rock dust
The compost had been maturing for 12 months and was looking like a really good growing medium. I added minerals and lime at the half full mark.
Wicking bed all filled with compost and another addition of lime and minerals
After adding the compost, I added another dose of lime and rockdust as well as some blood and bone. I will water this in and the bed will settle a bit. It’s raining at the moment so I may not have to water it in.
The white pipe on the side of the bed is the overflow pipe. It is connected to the filler pipe and the ag pipe that goes around the base of the bed. This pipe is slotted so the water can spread quickly through all of the bed.
The overflow pipe is there in case it rains very heavily (quite likely in Brisbane) and water needs to be evacuated. The ag pipe will collect water as well as distribute it and it will rise up and out the overflow outlet. The other reason is in case I forget to turn off the hose when I am filling the bed.
This weekend I will get the pest exclusion fabric on and work out how to access the bed easily. I will also get some wire hangers in and will be able to show you some good ways to tie up tomatoes. I have bought some Black Russian tomato seed and some Roma. I will plant one of each in the southern end. Thats all for now.

Health and Fitness
You may have worked out from the timeline on the posts that my work rate has slowed down a bit. Especially with the wicking bed construction. They are building a two story house two doors up and the subbies must be laughing at the old bloke down the road.
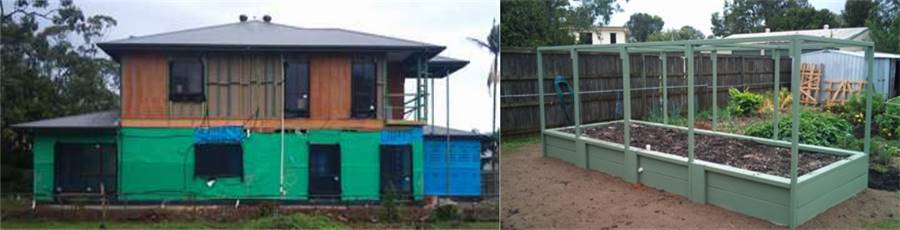
Lower back pain has slowed me down. In the time it took me to build the hugulculture wicking bed, look how far they have got with the new house build.
They started building about the same time I got the bobcat bloke Gino in to level the site. I had already painted the cypress sleepers with one coat and cut them to size when they laid the concrete slab. In the time I got to building the bed and filling it with soil, they have dug and poured the footings, done the rough in plumbing, poured the slab, stood the frames for the ground floor, done the floor for upstairs, stood the second story frames, put up the scaffolding for the gutters and downpipes guy, installed the roof and insulation, installed gutters, removed scaffolding, second roughin for plumber, electrician initial roughin, airconditioning roughin, computer wiring guy, windows installed and are now working on the gyprock install.
Me, I’ve put together a 5 metre by 1.8 metre wicking bed and added the frame work for my pest exclusion material.
Lower Back Pain
The reason I have been a bit slow is lower back pain. Just looking at a 2.4 mtr, 20cm x 5cm cypress sleeper was hurting, let alone bending over and picking it up from the ground. The following might give you an idea of how I was feeling. I make my own compost and I wanted to transfer some to the garden from one of the big piles.
Not the cure for lower back pain
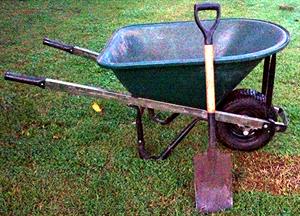
The cure for lower back pain – NOT!
I got the wheelbarrow and a spade. A spade is a lot smaller than a shovel and was about all I thought I could manage. I wasn’t rushing as I new it was not going to be the easiest of tasks. I loaded the first spadeful and was thinking that I should be able to keep going. The second spade full wiped that idea. The only way I was going to get this done was to get down on my knees and shovel it in from there. That way I didn’t have to bend. Going slowly, I was able to move four barrow loads of compost to the garden. But I knew something needed to be done if I was going to get the things done in the yard that I wanted to do.
I don’t like going to the doctor. I reckon most of them are a blight on society and are just legalized drug pushers. That’s not to say I haven’t known some great ones and been impressed with their knowledge and human kindness. The problem is me, I dislike taking drugs, tried that, think it’s a waste of time and life. So I needed to do some internet research. So armed with the knowledge I knew where the pain was, lower back and right hip, I went to work. I also thought that I had been sitting on my arse too much using the computer and that I had stopped playing sport. This made me head in the exercise direction.
I came up with the following exercises that haven’t cured the pain but have made it much more manageable. There are days when I think I am floating, I feel like James Brown.
Go to this url http://breakingmuscle.com/yoga/heal-your-lower-back-pain-with-these-5-yoga-poses?page=0,0

Supine Hamstring Stretch
This exercise seems to be helping a lot. I can feel that my right leg is a lot harder to straighten and get to the vertical.

Two-Knee Twist
When you go to the page you will get all the instructions on how to do them properly. I do the first three at the moment. When I started I was gung ho and did them all but found I wasn’t as motivated after three days, so dropped it down to the first three. I now find I am increasing the times spent holding each position.
Breathing and counting
I have found that to time myself I breathe in while counting: and 1 and 2 and 3 and 4 and 5 then I breathe out: and 6 and 7 and 8 and 9 and 10. I count to sixty and repeat three times on each leg for the first exercise. I count for two minutes on the second and third exercise.
I have confirmed my suspicions that a couple of old sport injuries have contributed to the pain I am feeling from these exercises as they highlight the areas I have difficulty with. Like in the above picture, there is no way yet that I can lay one leg on top of the other doing that twist, the upper knee sticks up about 15 cm from the lower knee. My right hip has pain and that is the knee that sits up the most from the lower knee.
Has it done any good for the lower back pain.
I have been doing these now for three weeks and on the weekend I was able to fill up the wicking bed with some logs and about 5 cub mtrs of compost soil. On Monday night I found it difficult to get off the couch, I had to rock a bit to get some momentum but I was fine on Tuesday and Wednesday. So for me yoga type exercises are a must. I need to develop the habit of doing them on a daily basis.
I will also look for a few exercises to improve my stomach muscles and core as I think they will help as well. I have learnt to approach these things slowly as experience tells me that when I go all in to start with I find it difficult to maintain the enthusiasm to persist. If I start slowly and master a few techniques and stop myself from trying to be perfect in the first couple of days I start to light a slow burn wick that gets brighter over time.
You may have gathered that I am a bit of a tight wad and loathe wasting money. I also believe that the answers are already there in your head, you just have to slow down enough, listen to the voice inside and act on that internal knowledge.
PS: As a child learning English at school I was told repeatedly, “when writing a composition, don’t start your sentences with I”. On re-reading this post, I find that nearly every second sentence starts with I. It will take quite a bit of thinking and time for me to change all the sentences starting with I, therefore I am leaving them that way. If you have any suggestions that makes it easier to write a sentence without starting with “I” then I am all ears. Would love to hear them.
All the best Olman
Experiments
It is taking longer than I planned to build the wicking bed, but I got a lot closer to completion today. The completion is in sight and seeing that I want to plant by the winter equinox, 22 June, I think that it will be achieved.
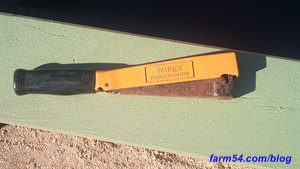
A hammer stapler helps intstall the plastic liner
There were a couple of items that I was procrastinating about, getting staples for my hammer stapler and getting some old carpet for the base.
The carpet might seem unusual, but I wanted to have a base that would protect the plastic liner. I needed to source some carpet that had been pulled up from houses. After mucking around and looking on Gumtree for free carpet for a week or two, I finally hit upon the idea of going to a carpet shop and seeing if they had any carpet that had been pulled out of houses where they laid new carpet.
Sourcing carpet for the wicking bed build
I strolled into Just Carpets, Virginia, spoke with Darrin and he took me down the back to a big pile of rolled up carpet and said, “Help yourself, take it all if you want.” I loaded four rolls into the car and drove off feeling pleased with the trip.
On Friday, I wrote a list of things I wanted to complete by Sunday
- carpet wicking bed
- plastic lining installed
- plane edges of uprights
- finish sides and tops

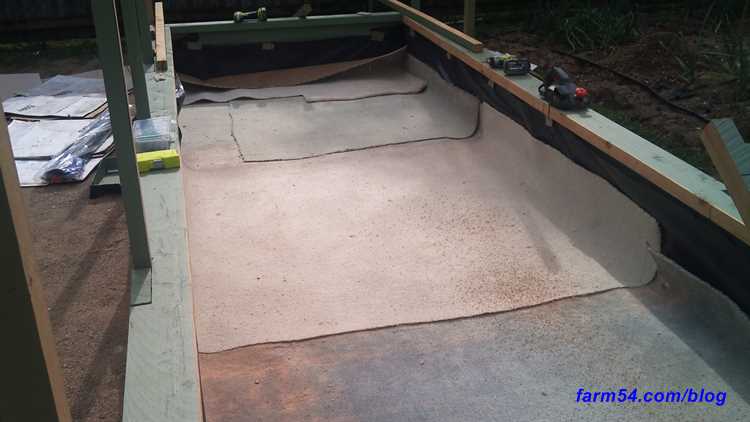
A layer of carper was intsalled before the plastic liner

Installing the plastic liner
The rest of the carpet was laid on top of the liner giving it protection when I worked in the bed
I was able to get all the above done.I still have the following to complete before planting:
- finish painting
- install the agpipe and filling spout
- fill with soil and compost and water
- install shade cloth
- install wire for trellising
- plant
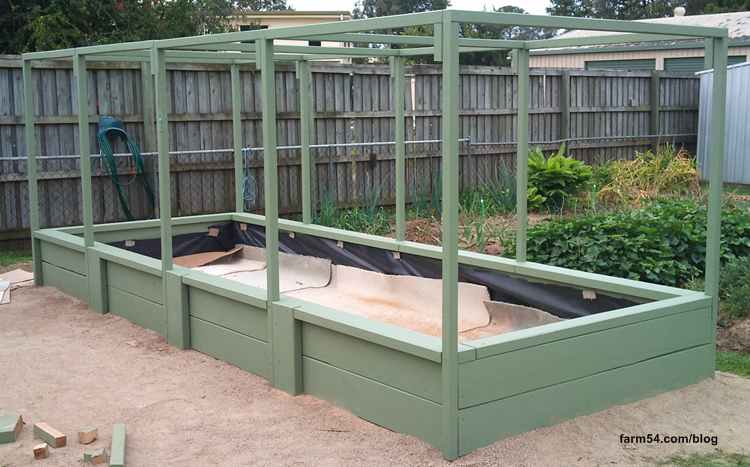
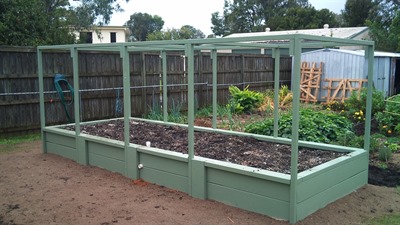
Painting done, the wicking bed is now ready to fill, then shadecloth
A couple of years ago I used a Silky pole saw to reduce the height of a macadamia in the back yard. It was close to 12 metres high (40ft). I cut the branches into small lengths and stacked it up. I now have a use for it. I will turn this wicking bed into a hugulculture wicking bed. (see this post on hugulculture)
