
Natural Gardening
There are many ways to grow tomatoes. Staking them or putting a wire cage around them or easier easy ways like letting them grow wild or stringing them up. I like all ways, but I have worked out a little twist on letting them grow wild.

If you plant tomatoes and let them grow wild, they will soon take up all the space in your garden and they will have formed so many laterals, you won’t know where the plant starts and ends.
The fruit will be lying on the ground and getting attacked by every pest known to man. What you thought would be the easy way has turned into the hard and non-productive way. You mutter to yourself as you pull that bloody tomato vine out. But you get a few shining moments as you rescue a few beautiful vine ripened tomatoes.
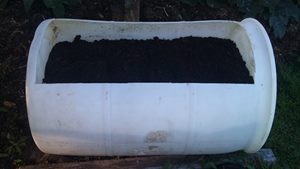
Instead of growing your tomatoes in the garden, grow them in a 200litre plastic drum.
Get some really good soil and add some worm castings, maybe some rock dust and some compost.
I learnt to grow tomatoes the easy way by accident. I had a 200 litre drum, on its side, as a worm farm. When I made my bigger worm farm, the drum was left sitting for a while and a volunteer tomato and passionfruit grew out of the worm castings. I didn’t take much notice and then some fruit formed so I kept and eye on it. The tomato produce quite a few fruit, had no disease and very few pest problems. I credited its good performance to the worm castings.
Because tomatoes are such hardy beasts, I didn’t shower it with much attention and only watered it if it wilted. Sometimes that would be a month to six weeks after a downpour of rain. If tomatoes were getting close to the ground, I raised them up by putting a block of wood under them.
Because the tomato had to grow up and out of the drum, I only had to support one tenacious lateral with tomatoes on it.
Getting Ready To Transplant Seedlings
These are Black Russian tomato seedlings. On the left are the remaining two from a punnet bought at Bunnings. Your can see they have been neglected in comparison to the two from the same punnet, planted in the wicking bed. In the punnet is a seedling I grew from seed. The seed was purchased from The Seed Collection. It was looked after a bit better than the others.


When I plant tomato seedlings, I plant them so that the leaves are right at soil level. This allows more roots to grow from the stem.
After planting I water them very well and won’t water again for at least 4 weeks, or if they are wilting in the morning before it has warmed up. They are hardy beasts and by not watering, they don’t grow all long and leggy. The idea is to make them want to produce fruit and you don’t want them to grow a lot between each level of fruit.
If a plant thinks that it might not survive, it produces fruit to ensure the species ongoing survival. Treat it too well and it doesn’t use it resources to maximise fruit production. Like us, when we get too comfortable, we don’t try to improve our situation.
Natural Gardening
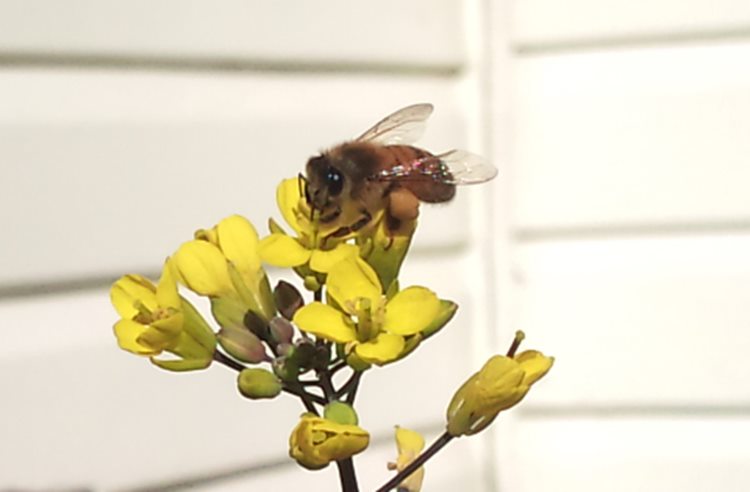
Have you noticed in your garden that there are relationships between different life forms where one form of life is dependent on another life form for its survival. The easiest symbiotic relationship to see is a flower and a bee. The flower produces pollen, which is one half of its survival mechanism. In order to reproduce, the flower needs this pollen to be distributed.
Pollination definition from Wikipedia.
Pollination is the process by which pollen is transferred from the anther (male part) to the stigma (female part) of the plant, thereby enabling fertilization and reproduction. It is is unique to the angiosperms, the flower-bearing plants.
Enter the bee
The bee is attracted to the pollen produced by the flower and happily skips from flower to flower collecting pollen, it also fertilises the flower so that it can create seeds and ensure its future survival. Without the bee the flower would be relying on other less productive insects for its pollination.
The ginger family and earthworms
If you have ever harvested ginger, galangal, turmeric, kraichi or any other ginger like rhizomes you will dig up a lot of worms that have made home in the rhizomes. They are not your small red wriggler compost worms but the large fat deep diving ones that are usually found deeper in the garden. Yet here they are only a few centimetres deep in the rhizomes.
Maybe, like in Dune (a science fiction classic) the ginger family has a thumper that creates a pulse or rhythmic beat that attracts these worms to the rhizome. Or, more likely, the rhizome exudes a substance that is intoxicating to the worm and attracts them. In return the plant benefits from the worm castings.
 I harvested some turmeric yesterday but didn’t take a snap of the worms. But I watched a RobBob video of him harvesting some garlic and turmeric and the worms he found in the rhizomes. Click on the video and it will open in a new window
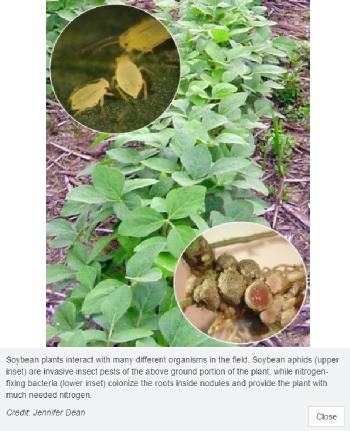
Soybeans and Rhizobia bacteria
An invasion of soybean aphids poses a problem for soybean farmers requiring application of pesticides, but a team of Penn State entomologists thinks a careful choice of nitrogen-fixing bacteria may provide protection against the sucking insects.
Soybeans are legumes, plants that can have a symbiotic relationship with nitrogen-fixing bacteria — rhizobia — and therefore do not need additional nitrogen fertilizer. Each type of legume — peas, beans, lentils, alfalfa — have their own rhizobia.
 “Soybeans are from Asia and so there were originally no nitrogen-fixing bacteria that would colonize soybeans in U.S. soils,” said Consuelo De Moraes, associate professor of entomology. “The rhizobia had to be transferred here.”
The soybean aphid is also not native to North America. This pest only began to infest soybean fields about 10 years ago but are now fully established pests requiring pesticide applications to avoid the loss of as much as 40 percent of the crop. The researchers investigated the relationship between the type of rhizobia colonizing soybean plants and the plants’ infestation with the aphids.
“Our results demonstrate that plant–rhizobia interactions influence plant resistance to insect herbivores and that some rhizobia strains confer greater resistance to their mutualist partners than do others,” the researchers report in the journal Plant and Soil online.
The above information is from Science Daily. The complete article goes on to describe how wild native rhizobia bacteria help overcome the problem of the soybean aphid, but the bacteria used as an innoculant is an aggressive bacteria that fights off the wild native bacteria. They describe the experiments undertaken to prove their theory.
Fortunately, here in Brisbane I haven’t had the problem of aphids in the soybeans I grow, needless to say, one day it will come. At the moment I grown soybeans all year round. That way I am trying to create a wild bacteria that is in the ground and becoming indigenous. I harvest some seed early and let it fall into the garden. By the time I harvest the rest, young soybean plants are growing and providing a home for the rhizobia bacteria in the nodules they create in the root system.
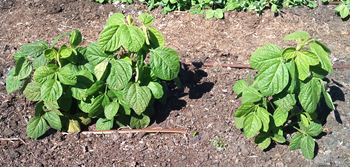 This picture was taken this morning. It is late winter here in Brisbane and although these are not growing as well as in summer, they are providing a home for the rhizobia. This is the first time I have done this and it will be interesting to see the result and if they produce any beans. There are a couple of other soybean posts that should be listed in the tags below.
All the above examples are symbiotic relationships where both parties get benefits from their relationship. The bee gets pollen and the flower is pollinated. The worm, I am sure gets something and the ginger gets the benefit of tunnels for oxygen and the goodness from the worm castings. The soybean gets the nitrogen from the rhizobia in a form that it can uptake and the bacteria gets a root exudate that it can feed on.
Pathological dislike
From working in the garden and seeing all these things going on, I sometimes wonder why I have a pathological dislike for cabbage moths and cane toads. I am sure that there is something that benefits from their existence, but as yet I am still unable to fathom it.
What about ourselves? How do we benefit this earth that we live on? If you watch the television or read a newspaper there is not much evidence that we are a benefit. It would appear that man and woman are more a detriment than a benefit.
Fortunately there are quite a few people out there who are trying in their own way to lessen their detrimental footprint and improve their beneficial one. People like RobBob and many others whose blogs I have read or YouTube channels I have watched.
I read one blog where the young lady from Melbourne has gone plastic free. I haven’t got that enthusiastic yet, but every time I find plastic in my compost, I think of her and send up a silent thank you for people like her.

Alternative Thinking, Natural Gardening, Vegetable Trials
Do you find that when you plant your vegetables from seed directly into the garden, you get too many plants come up and you have to cull them? Isn’t it difficult to throw those young seedlings away? I find that I am always looking for a spot to transplant them to.
Those little seedlings are just getting started when you are supposed to euthenise them. What started as a small job ends up taking a couple of hours.
The solution to the problem.
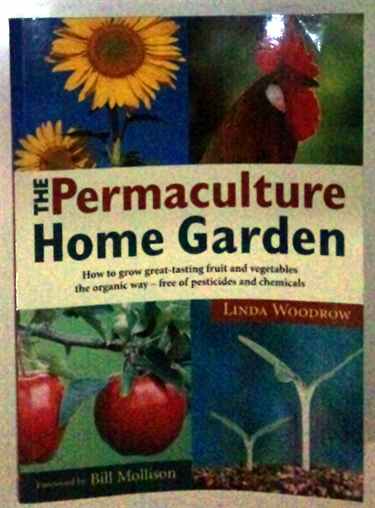
The Permaculture Home Garden Book by Linda Woodrow
The solution comes from a book titled “The Permaculture Home Garden”. Ordinarily I don’t read books about Permaculture because the ones I have looked at are mostly about design. I am more interested in what to do. I know design is important, but I just want to grow stuff.
Well this book is brilliant and what’s more it is written by a woman. Now don’t take that sentence the wrong way. I have tried reading numerous books by female authors and for the life of me I usually can’t get interested in them. There have been a few exceptions and this is one of them. It is full of down to earth information from building chook domes to making a seed raising mix.
Seed raising mix recipe
Materials for the seed raising mix
The simple recipe is a 50/50 mix of compost and coarse river sand. If you have read my posts on Calcium, you will know that I am a big fan of getting calcium into the soil. I also like to put it into my seed raising mix.
My formula is 3 cups of sieved compost, 3 cups of coarse river sand and 1 cup of lime. The seeds sprout a treat in this mix.
Part 2 of the equation
The second trick is to grow your seedlings in a bottomless container so that you can direct plant the advanced seedlings and pull the container up for protection for the seedling as it settles in.
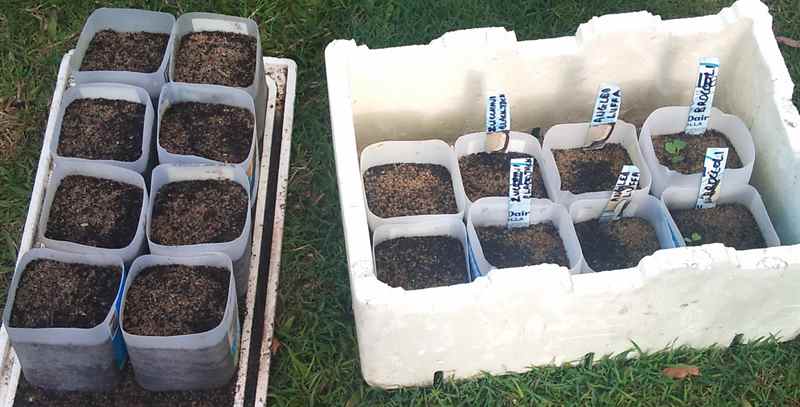
Pots to raise advanced seedlings in.
It settles in much quicker than if you grow a seedling in a punnet and have to remove it to transplant. The seedling suffers from transplant shock and takes a minimum of two to four weeks to recover.
The cheapest and easiest way to create bottomless containers is to cut the tops and bottoms off two litre milk containers.
By raising your seedlings this way, you don’t grow too many and you have an inexpensive supply of pots so you can be raising your advanced seedlings when your existing crop is half finished.
It also solves the other problem of having too much of the same vegetable at once and then not having any. Your planning is much easier
Natural Gardening
Here’s a bit of a run around the winter garden at the moment
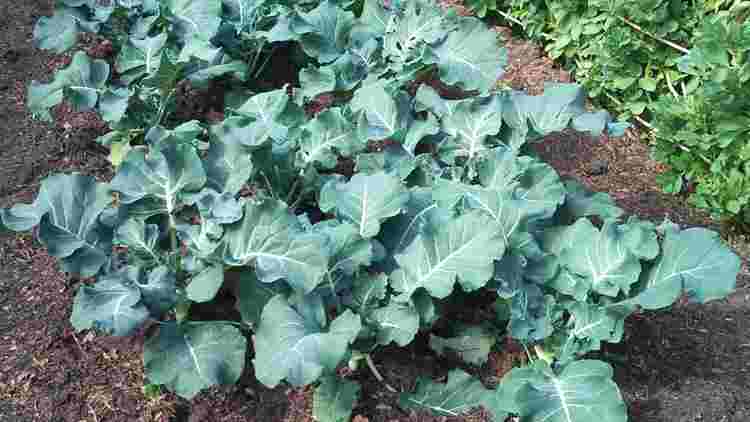
Broccoli
The broccoli seedlings were planted out around the 25th of June and are going gangbusters. No heads have formed yet and only found two caterpillars so far.

Broadbeans flowering but not many beans
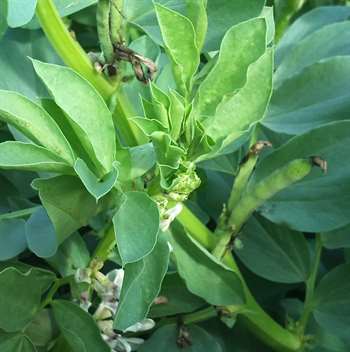
Couple of beans
There are 40 broad bean plants in the patch this year but so far only one plant has any beans on it. The tempeature has been quite warm for winter. Broad beans need day time temperatures below 21 degrees Centigrade and so far we have only had about three days this winter below that level. Here’s hoping we have a bit of a cold snap.
They were planted as seeds on the 12th of April.
Confrey: used for making a plant drench
I pick the comfrey quite regularly and either throw it into the compost pile or stuff it into a 200 litre barrel filled with water. I use this as a plant drench and tonic. Comfrey has a deep tap root and will drag up minerals from the soil. By composting it and making a comfrey tea with it those minerals are being provided to the other plants in the garden who don’t have such a deep root system able to source the minerals.
Comfrey is also good as a barrier to weeds. The hardest weeds to keep out of the garden are the running weeds like couch and kikuyu. Comfrey will help to stop them running into your garden.
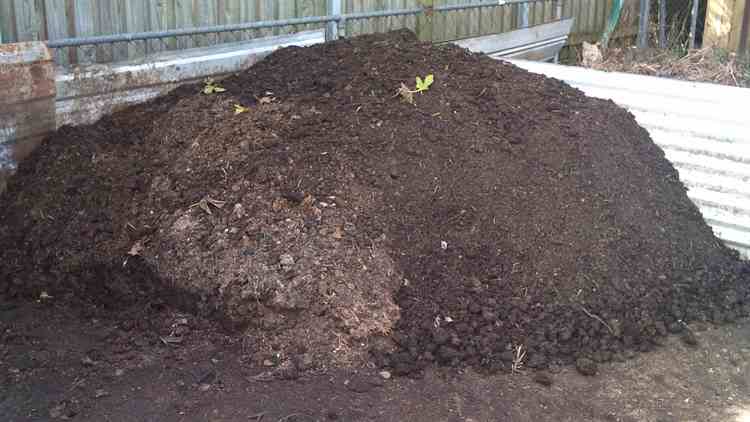
The compost pile. The compost was getting a little out of hand. I had three piles going and was running out of space for the lawnmower guy who supplies me with clippings. Over the last couple of weeks I have been aerating the piles and consolidating them into one location for transfer to the garden. It’s been a bit of a workout.
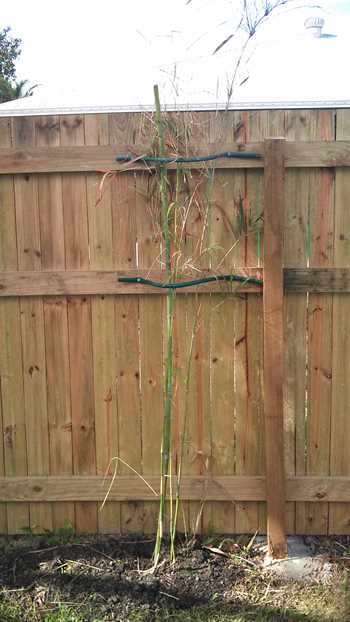
One of the edible bamboo I purchased
I was mosying around Northern NSW and ran into Tommy ‘Bamboo’ Lindley. He has a company called Bamboo Creations Australia in Burringbar. I was quite impressed with the bamboo farm he had been creating over the last twenty years and seeing that I was intersted in growing bamboo for eating I bought a couple to see how they would go. It’s a bit of an experiment as I don’t have a clue about bamboo or when to harvest the culms or how to prepare it, but I’m looking forward to discovering how.
I figured that the new fence at the back of the property was the perfect place to give them a bit of support until they can look after themselves. Can’t remember the species of bamboo, but the next time I am down Burringbar way, I will find out.
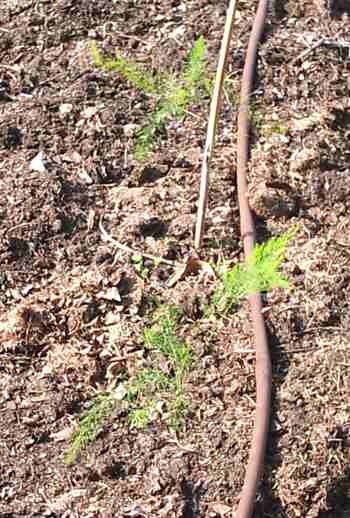
One year old asparagus crowns
I am a fan of asparagus. It makes a great side dish stirfried with mushrooms and some bacon. It is another vegetable I have never grown before so it was about time to find out how to grow them. I was in Bunnings and had a wander through the garden department and bought a couple of crowns to see how they would go. So far they are doing it on their own and haven’t been any problem at all.
These two crowns are 12 months old and were transplanted on the first of July
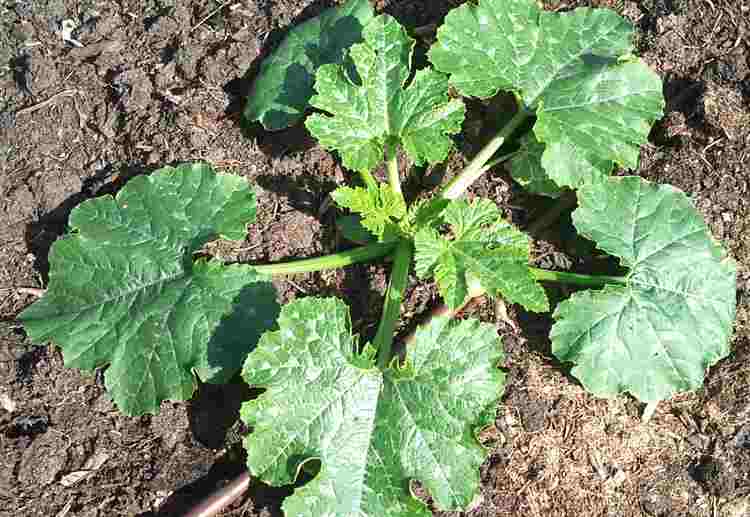
Zucchini Blackjack
A punnet of four zucchini was purchase on the 21 June and transplanted the next day. From their growth you wouldn’t know it was a winter garden.
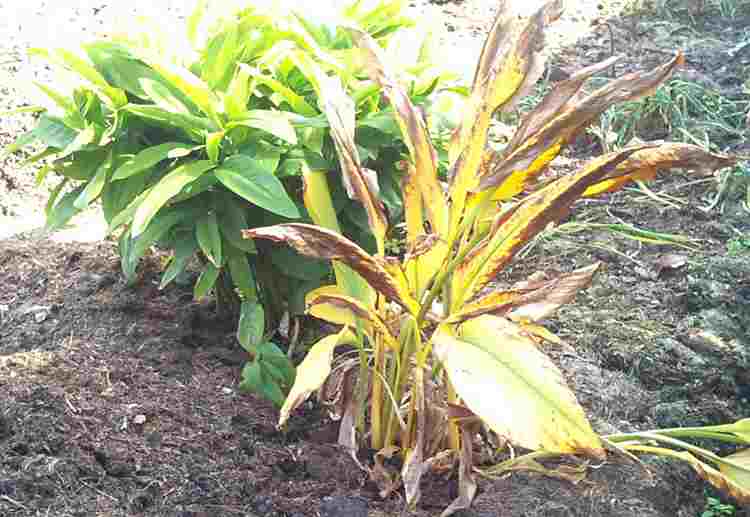
Turmeric and Galangal
It looks like it is time to harvest the turmeric. I am looking forward to seeing what the rhizome looks like and to try some. I have read amazing claims about the health benefits of turmeric so it will be good to see if any of the claims are anywhere near true.
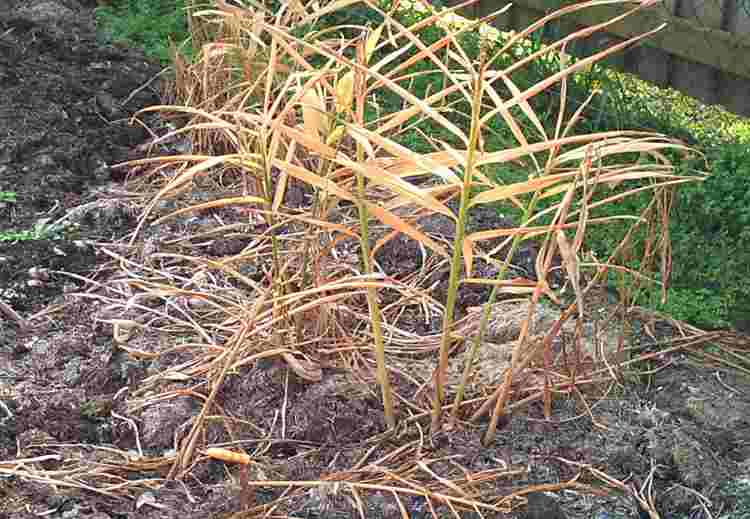
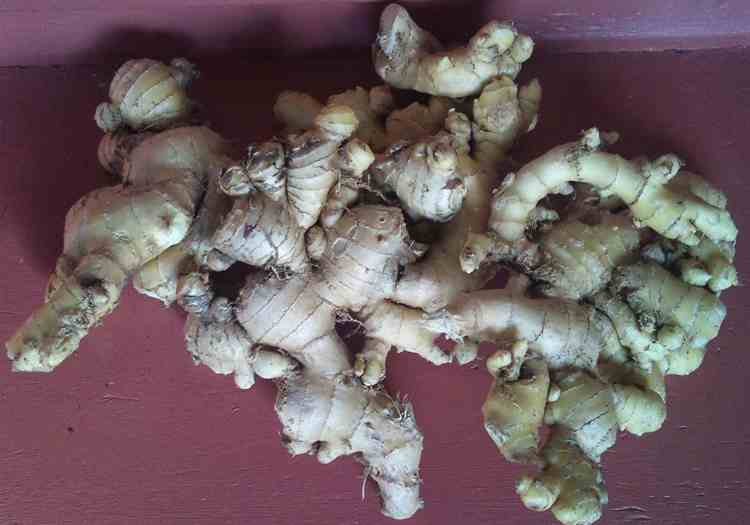
Ginger ready for harvest
Since this picture was taken the ginger has been harvested and with the other ginger harvested earlier there was in excess of 8 kilos. I have enough ginger for the next 12 months and for replanting. I have prepared the same bed with two barrowloads of compost, some crusher dust and some lime.I am looking forward to having a go a making some ginger beer.
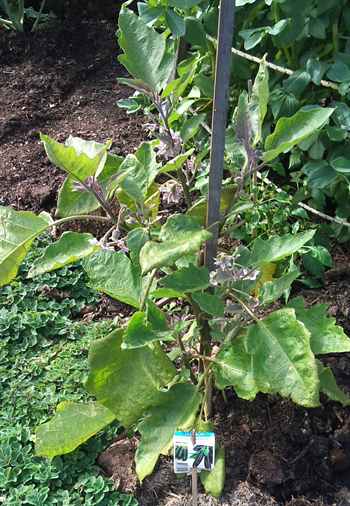
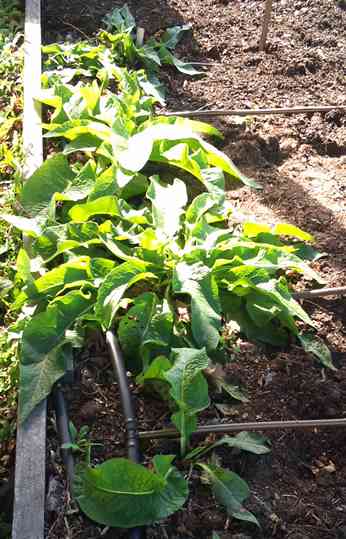
Egg Plant
Here’s a plant that loves the hot weather, the hotter the better. I am surprised to see it grow so well in winter. The catch is that so far none of the flowers have turned into fruit. It is probably the opposite of the broad beans in that it needs temperatures higher than what they are at the moment to set fruit. I will keep persevering and see what happens.
The ground cover under it is supposed to be Dutch coriander, but it doesn’t look anything like a parsley or coriander. It will be interesting to watch what it ends up like and what it tastes like.
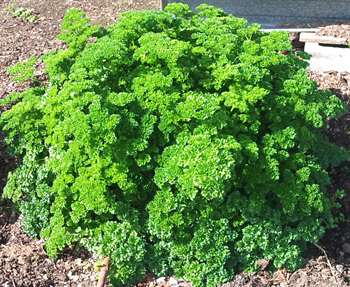
Too much parsley to eat
Talking of parsley, something is agreeing with the parsley as it is growing so well I have to pull handfulls at a time off this bush and feed it to the compost pile.
Must be all the compost it is growing in and the watering system.

A vounteer tomatoe in the old worm bed
I love volunteer tomatoes. This one has grown out of the old worm bed along with a passionfruit vine, though it is pretty hard to see the passionfruit as the tomatoe is out competing it. I think they are Grosse Lisse variety. They are quite firm and very tasty.

Snow Peas
Waiting for the snow peas to climb the trestle work and deliver some peas.
Everything seems to be growing well
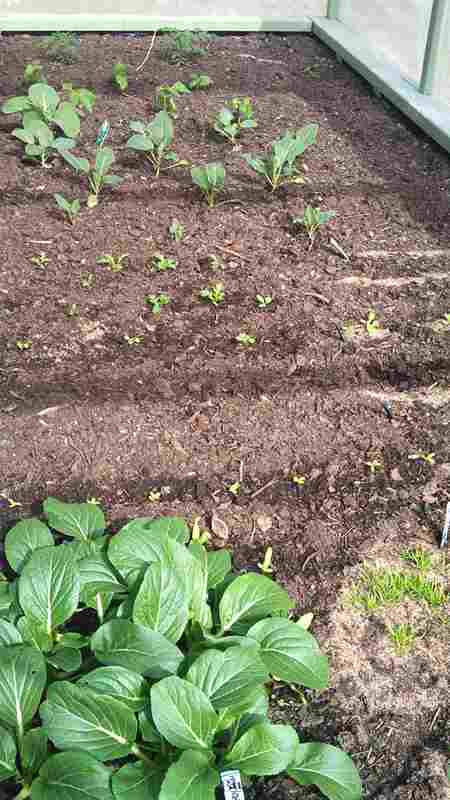
There are a couple of other items I have missed but will do them another day. However the wicking bed needs to be included. I have only filled it the once and it still seems to be moist enough for everything to grow.
At the top are two Black Russian tomatoes, then French beans, cabbage, cauliflower and Chinese and Japanese greens. All the small seedlings were grown from seed directly sown in the bed.
The larger leaf plant in the front are Choy Sum. They were grown in a punnet and transplanted.

Natural Gardening
Three levels of growth, aerial shoots, rhizome and tubers
I harvested some Yacon the other day and was quite surprised when it actually tasted like the descriptions I had read. The tubers taste something like a Nashi pear, a little sweeter and more fluid but a crunchy texture. We put some in a salad and I was picking the pieces out, they were that tasty.
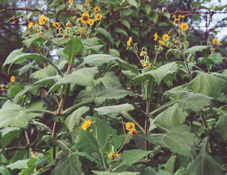
Yacon is a part of the sunflower family. Spikes can grow to 2 mtrs with small daisy like flowers
The plant takes 6 – 7 months to reach maturity. After flowering top growth withers and dies back and the tubers are harvested. They resemble dahlia or sweet potato tubers, on average weigh about 300 g but can weigh up to 2 kg. Once the soil starts to heave at the base of the plant, dig around to ‘bandicoot’ a few early tubers to extend the harvest season. The tubers continue to sweeten as the plant dies back so the main harvest should only take place once all the top growth is dead, usually by May. Don’t leave it too long though, especially in areas that have mild winters, as the plant will start to shoot again as the weather warms up and the days get longer. The plant needs to be dug carefully to avoid damage to the crisp tubers. After separation from the central stem undamaged tubers can be stored in a cool, dark and dry place with good air circulation for some months. The average sugar content of the tubers increases during storage because of starch conversion. They can also be exposed to the sun for up to 2 weeks to accelerate the sweetening process.
My Yacon Yield
The yield was not huge for the size of the plant and the reproductive part, which is a perennial rhizome looking a bit like ginger. The rhizome grows near the surface and sends out large aerial shoots that eventually produce a tiny yellow flower.
Underneath the rhizome the Yacon produces the tubers. This is the part that is of value to the people who grow it.
The Yacon is a native of the Andes from Colombia to northern Argentina. This could be why the harvest wasn’t as prolific as suggested as I am growing it in Queensland.
According to Wikipedia: Yacón can easily be grown in kitchen gardens in climates with only gentle frosts. It grows well in Kathmandu, Nepal and southern Australia (including Tasmania) and New Zealand, where the climate is mild and the growing season long. It does not grow well in New South Wales, Queensland, or Northern Territory.
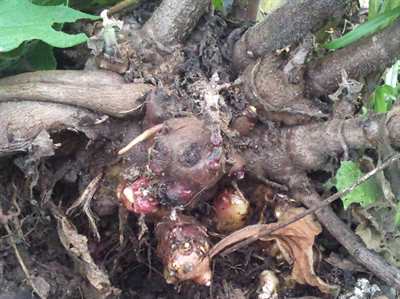
Yacon rhizome, looks a bit like ginger
In this picture you can see the perennial rhizome below the aerial shoots and below the rhizome are the tubers. The location I had them growing wasn’t the most fertile in the garden. This year I will create a very fertile location with plenty of compost and see if they give a better harvest.
Health Benefits
Like all new crops and crops that are not well known there are amazing claims of health benefits. The one that I can see as being of interest is the benefit for people with Type 2 diabetes. From Wikipedia Until as recently as the early 2000s, yacón was hardly known outside of its limited native range, and was not available from urban markets; however, press reports of its use in Japan for its purported antihyperglycemic properties made the crop more widely known in Lima and other Peruvian cities. Companies have also developed novel products such as yacón syrup and yacón tea. Both products are popular among diabetics and dieters.
Natural Gardening

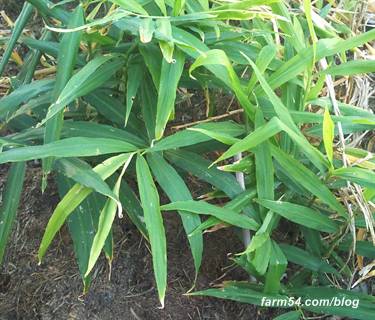
The leaves start to yellow as ginger gets close to harvest
A Sub-tropical climate is perfect for growing ginger. Brisbane in Australia is ideal. From my experience with ginger it is a very easy crop to grow and doesn’t take much maintenance.
I started by planting some ginger from the supermarket. I made sure that it was Australian ginger as this would help prevent introducing an overseas disease into my backyard.
Growing ginger from thumb sized pieces

Good buds or eyes and firm piece
All I did was pick all the small pieces out of the tray that looked like they had a growing tip or bud or eye. In most cases they looked like they were starting to grow. I handled them to make sure they weren’t soft and mushy as I felt that this indicated they wouldn’t rot in the ground.
When I first started I didn’t have any clue about the best time to plant, length of time before harvest or the best time to harvest. Over the last two years I have learnt a few things and can give you a few guidelines for growing ginger.
- Best time to plant – early spring
- Best time to harvest – when the leaves have died down Autumn/Winter
- Best growing environment – fertile soil, compost, moisture but not waterlogged, humid tropical environment. Some say partial shade is required, but I have found that ginger can be grown in full sun. I have dripper line irrigation on a timer so that the soil is kept moist. Perhaps this allows the ginger to grow in full sun.
The best part of growing ginger, besides eating is harvesting
I have just harvested some ginger and replanted some of the rhizomes in a new location. This location only gets sun in the morning, so it will be interesting to see if the ginger grows better or worse than in full sun.
There is still quite a bit of ginger to harvest and seeing as the leaves are still mostly green I will leave it a while longer before digging further.
In the top picture some of the leaves are greener than the others. The drier yellowy leaves are from the ginger left in the ground from last year. As mentioned I knew nothing about ginger when I first planted it. I harvested most of the ginger and left the rest in the ground to grow again the following year. It has definitely regrown as you can see from what I have harvested so far.
Leaves still green
Leaves of the small pieces planted are still green
The leaves that are still green are from ginger planted from the bits from the supermarket. On a number of occasions through the year I purchased some small corms and just put them in the soil. The results surprised me as most of them grew. I now have a rather large stock of ginger that I will replant in new locations.
Growing ginger is satisfying and easy to do. If you have a small area, even in the flower garden, bury some corms with the bud side up and be surprised at what you harvest. The leaves look good too and make a great background to more colourful plants.
Replanting a piece of ginger

From the left: Thumbsize piece of ginger, Choose location, Plant ginger eyes up, Cover ginger lightly, Mark the spot. Leave it alone for at least 8 months. It’s that easy
