Natural Gardening
Growing Soy Beans
Soy Beans are always worth growing in your garden. Like any bean, they are a legume and have that wonderful ability to attract a bacteria to live in nodules in its root system. It doesn’t just attract any old bacteria, but a specific bacteria that fixes nitrogen from the air. The bacteria and the soy bean create a symbiotic relationship that is based on “you scratch my back and I’ll scratch yours”. In this case the soybean provides the bacteria with carbohydrates, sugars and oxygen and the bacteria converts nitrogen from the air into plant available amino acids that feed the plant.
Soybean “Edamame”
Edamame is a large-seeded type of soy bean that is eaten as a green vegetable. It is both highly nutritious and a delicious nutty taste treat. It is prepared by boiling or steaming the pods for 5 – 10 minutes, then cooling under running water. It is eaten by squeezing the seeds from the fibrous pods. It grows best in temperate and subtropical climates. The seeds can be used as a dried bean, to make tofu, miso, soy flour and soy milk.
Inoculant
Store the inoculant in the fridge until ready to sow seed. To use, slightly moisten seed, stir in inoculant then add a small quantity of agricultural lime to coat the seed and make it easier to sow evenly. Sow seed immediately.
Nitrogen fixation is critical for high soybean yields. For nitrogen fixation to occur, the nitrogen-fixing bacteria known as Bradyrhizobia japonicum must be established in the soil through seed inoculation. Soybean can obtain up to 50 to 75{cd07be7979728a86b172d4c3c193ee8254293b2598ced4c874c66a7b3dbba444} of its nitrogen requirements from the air when nitrogen-fixing bacteria have established functioning nodules on the roots.
The soybean-bacteria symbiosis is mutually beneficial
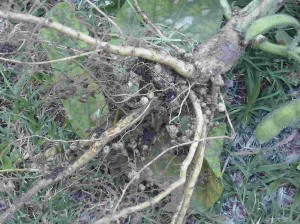
Edamame Soy Bean roots with nodules containing bacteria.
The soybean plant gets nitrogen from the bacteria, while providing the bacteria with carbohydrates. When soybean seed germinates, the bacteria invade the root hairs of the seedling and begin to multiply. Nodules, which house the bacteria, form on the roots. Under field conditions, the first nodules form within a week after seedling emergence and become visible as they increase in size.
There are some things I have learnt about growing soy beans that I haven’t seen in any text books or papers. The main one is that they improve their protein count when grown in calcium rich soil. Therefore, not only is it an advantage to coat the seeds in agricultural lime during the inoculation process, it is also a benefit to lime the soil that you are growing them in. In Queensland, Australia we have acid sulphate soils so lime not only increases the protein count, it also helps raise the pH of the soil towards neutral.
To find out if your soil is acidic, alkaline or neutral, get some litmus paper. Mix up a slurry of your soil and dip the litmus paper in and see what colour it goes. Use the colour chart to give you a rough idea of whether your soil is acidic or alkaline. If alkaline, use gypsum, or as it is chemically known, calcium sulphate to lower the alkalinity of the soil. From what I remember, hydrangeas will also indicate soil pH. If they are blue it is acidic and red if the soil is alkaline. Though it is also the amount of aluminium in the soil that has more influence, but it is more available to the plant in acidic conditions and less available in alkaline soil.

Natural Gardening
So far I have tried a couple of different composting ideas. They all involve an amount of work. Seeing that I am a lazy gardener, the less work I have to do and the more time I get to daydream and just enjoy the weather, the more I like it. That doesn’t mean that I dislike the routine of composting or the turning of the pile as the exercise is good for me. But, if I can make it simpler and easier then so be it.
At present I have a mowing contractor who drops off grass clippings and throws them onto a pile down the back. From time to time I turn them and throw some into the worm farms and at one stage I built a compost enclosure that he filled up.
It has been pretty dry over the last 12 months and the compost has not been getting very wet, so it has been slow in heating up and breaking down. This is where my new composting technique idea came in.
Using garden walkways is my new composting technique
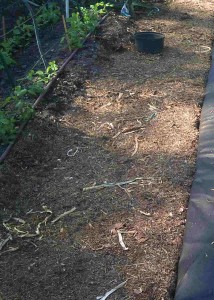
The garden walkways are now composting beds
I was pulling out last years crop and turning over some of the dirt in the walkways through the garden. It dawned on me that this could be a useful way to compost and also attract worms into the garden. I dug a trench about 45 cm (18″) deep and 60 cm (2ft) wide turning the dirt onto the garden beds each side. This served a dual purpose. It gave me a trench to put partly composted material into and built up the height of my garden beds.
Next time when I dig the garden over and get ready to replant, I will redig my walkway trench and throw all the compost that will be broken down by the worms up onto the garden bed. I will then refill the trench with partly composted clippings and assorted green waste.
The other thing I did after digging the trench was to place a layer of thick cardboard in the trench before filling it with compost. I noticed that the worms love the cardboard in the worm farm and thought it should help attract them into the garden.

Natural Gardening
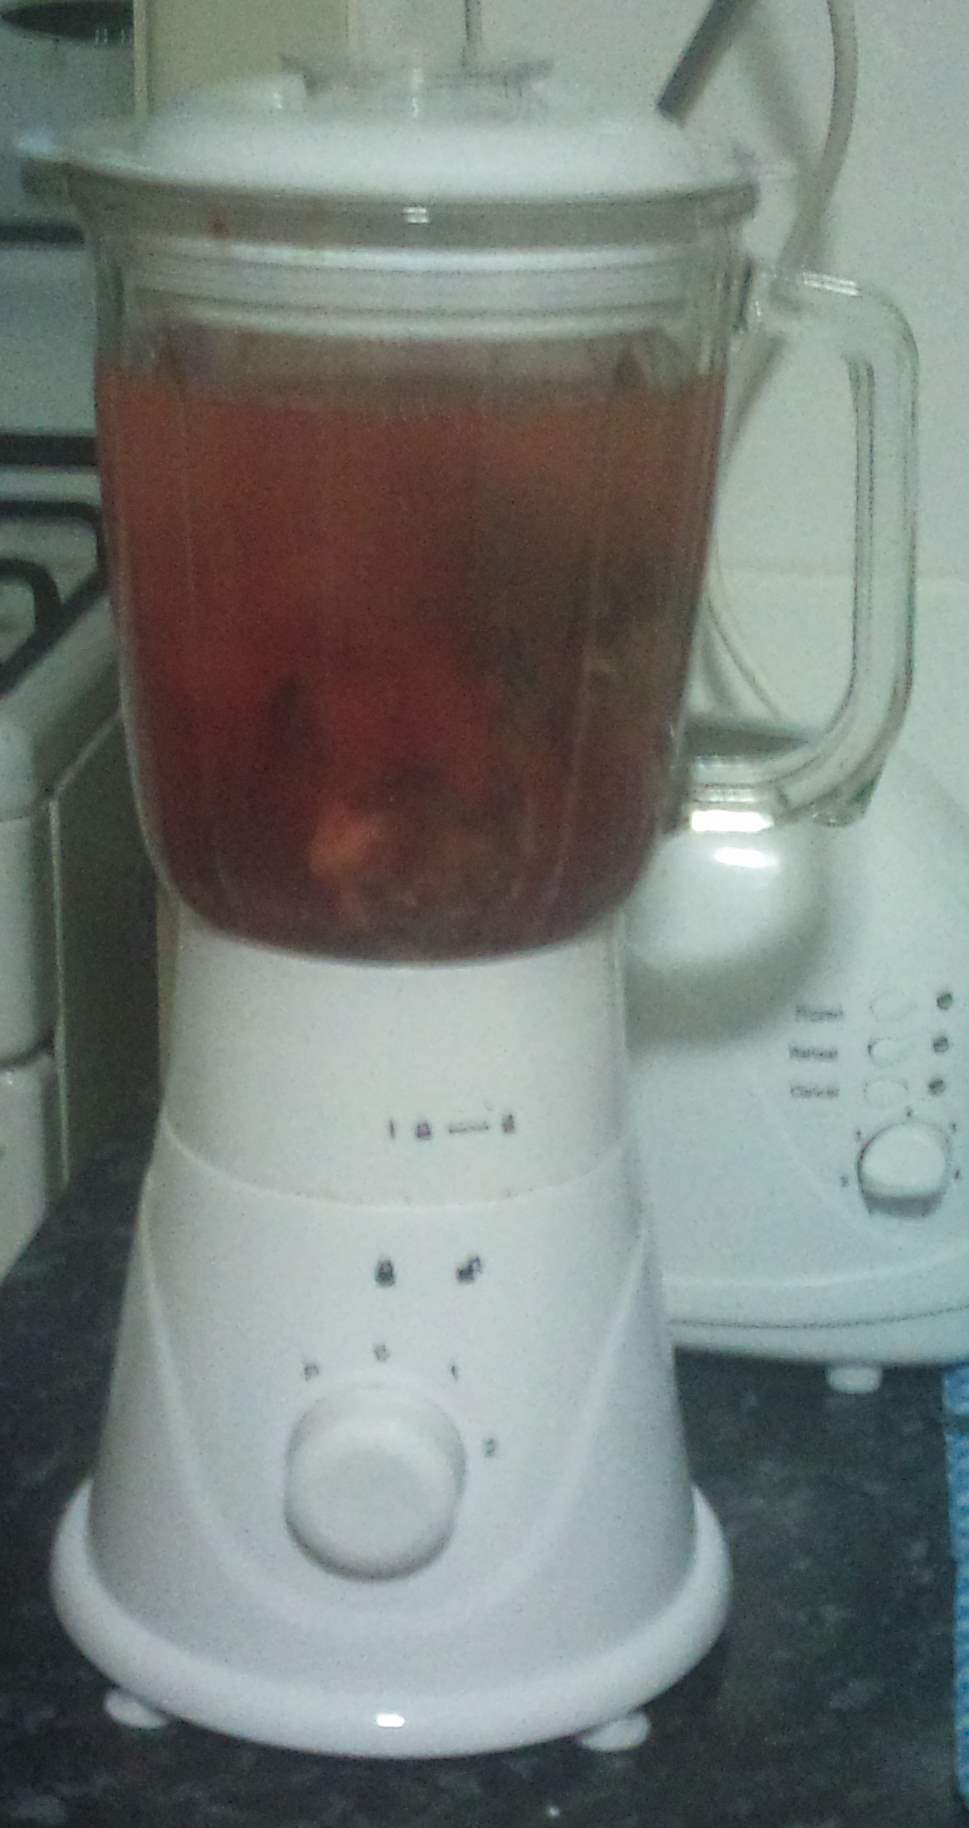
Fish fertilizer works in a number of ways. It feeds the plants and also feeds the soil microbes. Plenty of gardeners swear by it. Thing is it costs a bit in the store to buy. I have used it on plenty of occasions but have never made it myself.
Your own Home Made Fish Fertiliser

What a mess – You have to break a few eggs to bake a cake!
Yesterday I bought a fish. It was a sea mullet and was priced at $2 per kilo. The fish was whole and ended up costing $1.75 so it was under a kilo (2.2 lb).
The process I use produces a fish hydrolysate, or it is supposed to. It takes between 3 and 5 weeks for the process to work. The first time I saw it was around glasshouses owned by Vietnamese farmers. They used to make their own fish fertilizer for their crops. The only way to tell when the process has completed is by the smell. During the process the smell is bad but when it is completed there will be no odour or a faint earthy vinegar smell that is not at all unpleasant.
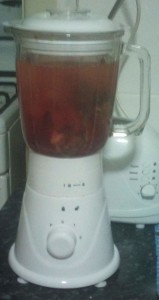
Ready To Blend
So I had my fish, now I had to mince it up. The more minced up the better. On my previous shopping expedition there was a food blender at Woolies for $29. Just the ticket.
Taking my trusty Silky Pocket Boy I cut the mullet into 50mm chunks and put the lot into the blender. I added about a litre of water. It is better to use filtered water or let the water stand overnight to dissipate the chlorine as chlorine kills microbes. We are using the microbes and enzymes in the gut of the fish to break down the fats and protein in the fish to amino acids and plant available protein, we don’t want to kill them with the water we use. Around 400 grams of raw sugar was added and around 150ml of lactobacillus solution I had left over from a batch I made.
After blending the lot to get it broken down as much as possible, I placed it in one of my trusty 4 litre ice cream containers and stored it in the shed to let the microbes and enzymes do their thing.
Costs so far if I don’t count the blender
Fish 1.75
Raw Sugar 0.40
LactoBacillus 0.20
Total 2.35
After straining the hydrolysate I will have around 1.5 litres of concentrated home made fish fertiliser that will be used at a diluted rate of around 2 tablespoons for 4 litres of water. When you dilute it for soil drenching or foliar spraying make sure you use water that has been left standing for 12 hours so that the chlorine can evaporate off.
I will update this when it has completed the process.
Natural Gardening
After mentioning hugulculture in the worm post, I thought that I should see how and if it works.
When I started the gardens, I didn’t realize that I was starting in the lowest part of the yard. I have since been enlightened as it has rained consistently since February and the yard has been inundated on a number of occassions.

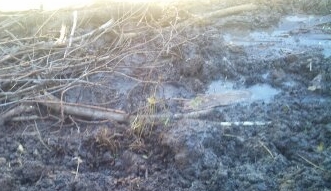
This area is sodden.
Making a raised bed will help
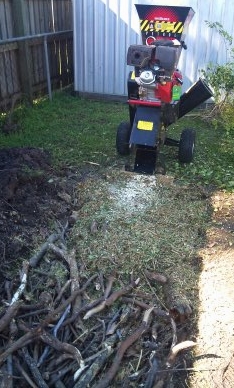
I chose the bed that is always wet to try the hugulculture experiment. In winter this section doesn’t get any sun because of a 2 metre fence on the northern side.
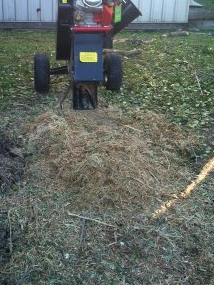
I dug out the bed to a depth of 25cm (10″). The first layer was branches, sticks and timber from around the property. I then got out the Chipper and used it to chip and shred all the prunings I had done recently. These went straight into the bed and brought it up to the previous ground level.

The wood is covered with woodchips and pruning mulch
The idea of the hugulculture is to use the timber, wood and mulch as a storage for water and to alleviate the pressure for constant watering during dry spells. There was no problem getting water to the wood going into this garden bed as it was saturated.
You can make out that the bottom of the bed in one of the pictures. It contained water. This was good and bad. It made it relatively easy to dig out the soil, but the “soil” was waterlogged and part clay so it was impossible to work into a friable garden bed.

Filled to Ground Level
I was surprised to see a number of earth worms, as the first time I dug this bed I didn’t see a worm. I guess the combination of high moisture content, the compost I had applied and the growing of the mung beans as a cover crop has attracted them. The mung beans had succumbed to the excessive rainfall and being covered with water on three occasions.
The earth removed from the hole the wood, woodchips and mulch was placed in was returned to the garden bed on top. This made a garden bed about 25cm (10″) above the existing ground level.
Natural Gardening
Have you noticed that worms will always be found after the rain?
Have you also noticed that if you have some organic matter lying around in the backyard that after a while, if you decide to move it, there is always worm activity at ground level?
And if you go and dig in the garden, you can’t find a worm?
What do you deduct from that Dr. Watson?
Worms love moisture, worms love organic matter. Worms also love a place to hide or disappear to quickly.
Worms don’t like sunlight.
So taking those deductions, why would you go and spend $100 or so to buy a worm farm from your local hardware store?
Would’t it be better to create an environment closer to what a worm has in the wild?
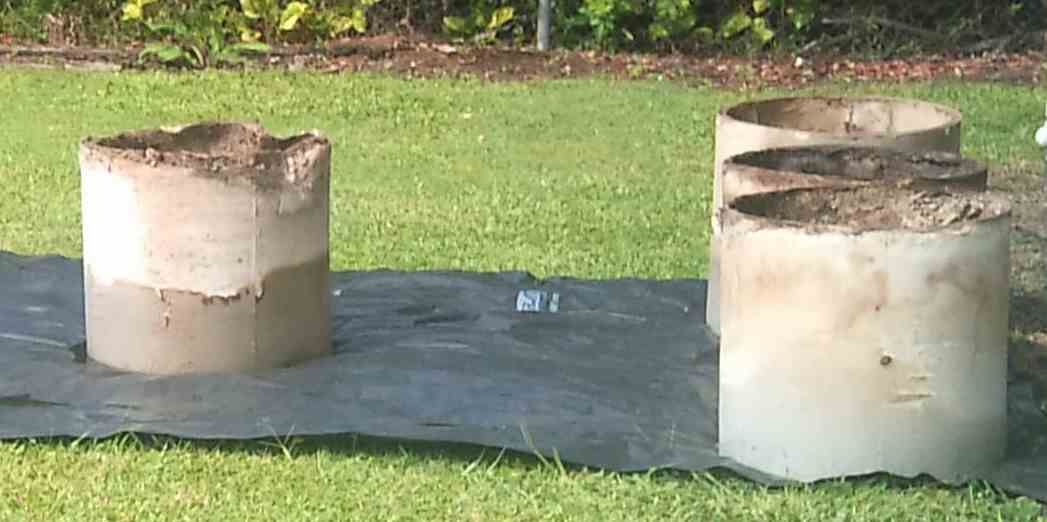
I use a variation of what is called hugulculture(rotted wood in raised beds). I have some round cardboard cylinders that I placed on plastic sheeting. The plastic is being used as a solariser to get rid of couch grass that is throughout the place. It will be in the one place for over 12 months to ensure that the couch has been really killed.

Starting more worm farms
In the bottom of the cylinders I placed some small branches and sticks. Next was some grass clippings and foliage that had been composting. Next was the contents of styrofoam boxes that I had been using as worm farms while waiting to move to this place.
It has been raining quite heavily here in Brisbane since February. Winter is the dry season but it is still raining. The cylinders have been great. They are like a raised garden bed. No matter how much it rains it has not affected the worms. They haven’t drowned even though we have had excessive rain and some parts of the yard have been underwater.
Originally I purchased around $30 worth of worms from an old bloke around the road from me. He didn’t go to the trouble of counting them, just reckoned that I had many more than a thousand worms in the styrofoam box. I took his word for it and haven’t bought a worm since. They have continued to multiply and I now have six of the cardboard cylinders containing worms. Some of them are half full with worms and organic matter and the rest are full.

More Worm Farms Some With Potatoes
I use the worms and castings when I grow seeds. I half fill a styrofoam box with some of the material in my worm beds (cardboard cylinders), some soil and some of the compost I have been nurturing. After seeding and wetting with the watering can, I place a sheet of glass on top and leave in a sunny position. When the seeds have sprouted and grown to a reasonable size, I transplant to the garden.
Natural Gardening
It is a natural plant sweetener that has no calories and was banned from food usage in the USA by lobbying from the sugar industry. That ban was applied throughout the world and has only recently been lifted in Australia and the USA 2008 and Europe 2011.

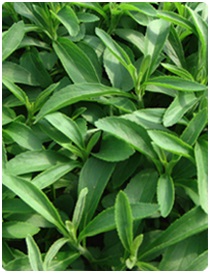
Stevia Leaves
The Food Standards Australia New Zealand (FSANZ) conducted a comprehensive risk assessment prior to approving the addition of Stevia to the Australian food supply in 2008, and concluded that steviol glycosides are unlikely to have adverse effects on health (blood pressure, blood glucose or other parameters in normal, hypotensive or diabetic subjects) at doses up to 11 mg/kg body weight (bw) per day. They specifically examined any potential adverse risk to children and diabetics and concluded “there are no public health and safety concerns for steviol glycosides when used as a food additive at the maximum levels proposed”.
http://www.choice.com.au/reviews-and-tests/food-and-health/food-and-drink/groceries/stevia-sugar-substitute.aspx
The Stevia Rebaudiana plant is part of the Chrysanthemum plant family .
It is native to South and Central America, but is now grown in more than 20 countries throughout the world.
The sweetness found in Stevia is attributed to steviol glycosides found in its leaves.
Stevia is called “Ka’a He’e” (“Sweet herb”) in Guarani, the indigenous language of Paraguay and parts of Brazil
Stevia is a natural sweetener which is 200 to 300 times sweeter, when concentrated, than sugar .
If you grow the plant and eat the leaves or steep them to make a tea, they have a sweet taste. Most people find the after taste pleasant as well. They can become bitter if you let the plant flower. It is best to deflower so that it keeps growing leaves. The leaves become sweetest in Autumn prior to shutting down for winter.