
As mentioned on the Chipper/Mulcher review page it is easy to remove the chipper blade from the chipper/mulcher. It is not as easy to sharpen it though, as it is made from HSS (high speed steel) which is hardened for the purpose it is used for.
Removing the blade
I tipped the machine up and rested it on the tow bar and placed a large piece of wood under the front so that it would stay in position.
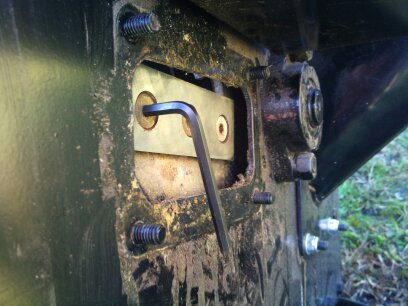
Chipper blade viewed through Access Hatch, showing Allen screws and key
The chute cover was removed and the chipper blade access cover was removed. This allowed access to the nylon threadlock nuts and the Allen screws holding the blade on.
After removing the blade I could see that it was blunt and had some nicks in the blade. The blade has two cutting faces. By turning the blade 180 degrees you get to use the second face for cutting. I had previously turned the blade. It was now time to sharpen it.
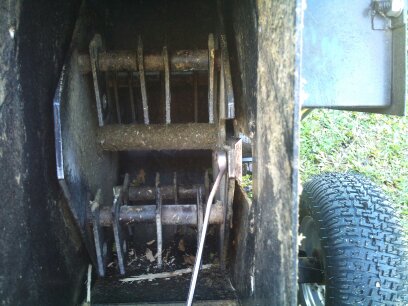
The lock nuts are accessible after the chute and screen are removed
This was to be done with a file and stone. I don’t have power in the shed yet. It took quite a while to make an impression on the cutting face and to partly remove the nicks in the blade. The good thing was that it gave me some practice on getting the filing angle correct and some practice using a sharpening stone.
Next time I will take it to a mate’s mower shop and get him to sharpen it for me.
I was able to finish the job I wanted to do with the chipper. Thankfully I had sharpened it enough for that.