
Alternative Thinking, Natural Gardening, Vegetable Trials
Do you find that when you plant your vegetables from seed directly into the garden, you get too many plants come up and you have to cull them? Isn’t it difficult to throw those young seedlings away? I find that I am always looking for a spot to transplant them to.
Those little seedlings are just getting started when you are supposed to euthenise them. What started as a small job ends up taking a couple of hours.
The solution to the problem.
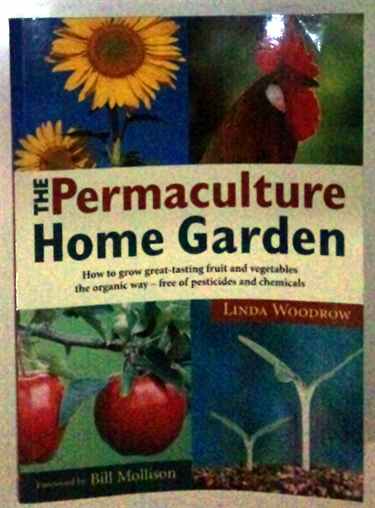
The Permaculture Home Garden Book by Linda Woodrow
The solution comes from a book titled “The Permaculture Home Garden”. Ordinarily I don’t read books about Permaculture because the ones I have looked at are mostly about design. I am more interested in what to do. I know design is important, but I just want to grow stuff.
Well this book is brilliant and what’s more it is written by a woman. Now don’t take that sentence the wrong way. I have tried reading numerous books by female authors and for the life of me I usually can’t get interested in them. There have been a few exceptions and this is one of them. It is full of down to earth information from building chook domes to making a seed raising mix.
Seed raising mix recipe
Materials for the seed raising mix
The simple recipe is a 50/50 mix of compost and coarse river sand. If you have read my posts on Calcium, you will know that I am a big fan of getting calcium into the soil. I also like to put it into my seed raising mix.
My formula is 3 cups of sieved compost, 3 cups of coarse river sand and 1 cup of lime. The seeds sprout a treat in this mix.
Part 2 of the equation
The second trick is to grow your seedlings in a bottomless container so that you can direct plant the advanced seedlings and pull the container up for protection for the seedling as it settles in.
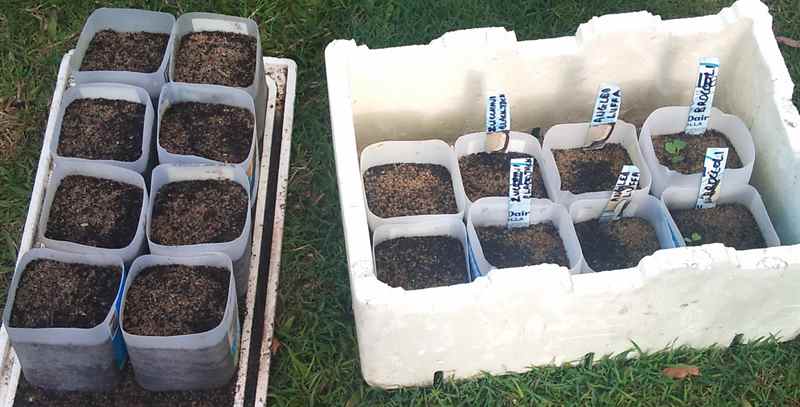
Pots to raise advanced seedlings in.
It settles in much quicker than if you grow a seedling in a punnet and have to remove it to transplant. The seedling suffers from transplant shock and takes a minimum of two to four weeks to recover.
The cheapest and easiest way to create bottomless containers is to cut the tops and bottoms off two litre milk containers.
By raising your seedlings this way, you don’t grow too many and you have an inexpensive supply of pots so you can be raising your advanced seedlings when your existing crop is half finished.
It also solves the other problem of having too much of the same vegetable at once and then not having any. Your planning is much easier
Natural Gardening
Here’s a bit of a run around the winter garden at the moment
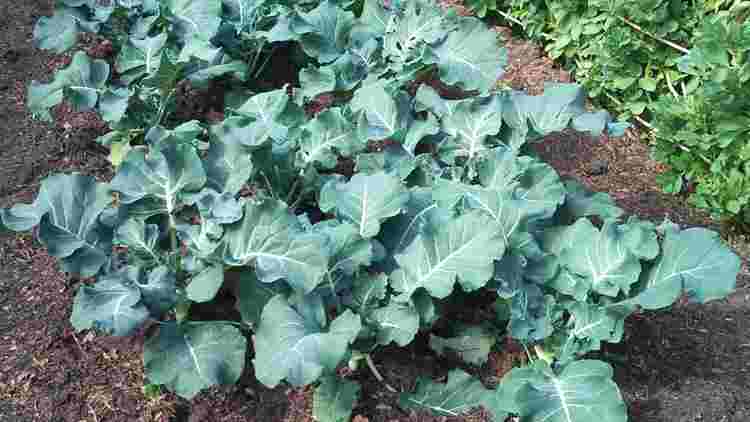
Broccoli
The broccoli seedlings were planted out around the 25th of June and are going gangbusters. No heads have formed yet and only found two caterpillars so far.

Broadbeans flowering but not many beans
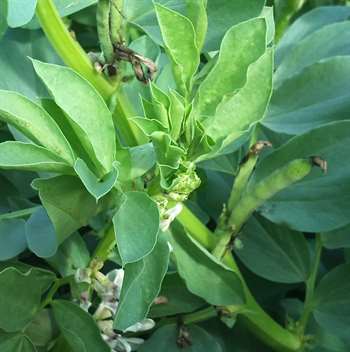
Couple of beans
There are 40 broad bean plants in the patch this year but so far only one plant has any beans on it. The tempeature has been quite warm for winter. Broad beans need day time temperatures below 21 degrees Centigrade and so far we have only had about three days this winter below that level. Here’s hoping we have a bit of a cold snap.
They were planted as seeds on the 12th of April.
Confrey: used for making a plant drench
I pick the comfrey quite regularly and either throw it into the compost pile or stuff it into a 200 litre barrel filled with water. I use this as a plant drench and tonic. Comfrey has a deep tap root and will drag up minerals from the soil. By composting it and making a comfrey tea with it those minerals are being provided to the other plants in the garden who don’t have such a deep root system able to source the minerals.
Comfrey is also good as a barrier to weeds. The hardest weeds to keep out of the garden are the running weeds like couch and kikuyu. Comfrey will help to stop them running into your garden.
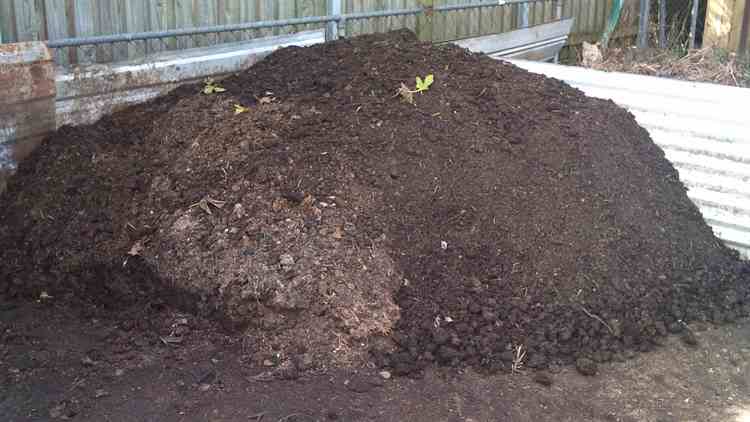
The compost pile. The compost was getting a little out of hand. I had three piles going and was running out of space for the lawnmower guy who supplies me with clippings. Over the last couple of weeks I have been aerating the piles and consolidating them into one location for transfer to the garden. It’s been a bit of a workout.
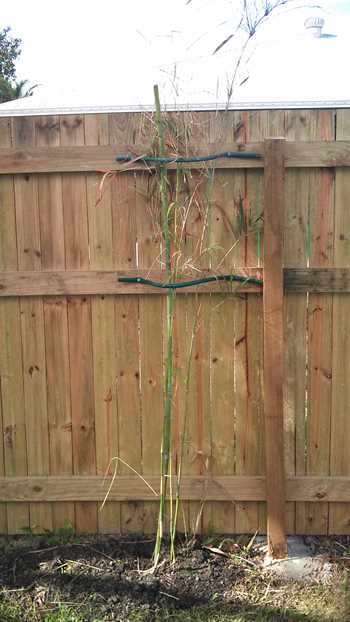
One of the edible bamboo I purchased
I was mosying around Northern NSW and ran into Tommy ‘Bamboo’ Lindley. He has a company called Bamboo Creations Australia in Burringbar. I was quite impressed with the bamboo farm he had been creating over the last twenty years and seeing that I was intersted in growing bamboo for eating I bought a couple to see how they would go. It’s a bit of an experiment as I don’t have a clue about bamboo or when to harvest the culms or how to prepare it, but I’m looking forward to discovering how.
I figured that the new fence at the back of the property was the perfect place to give them a bit of support until they can look after themselves. Can’t remember the species of bamboo, but the next time I am down Burringbar way, I will find out.
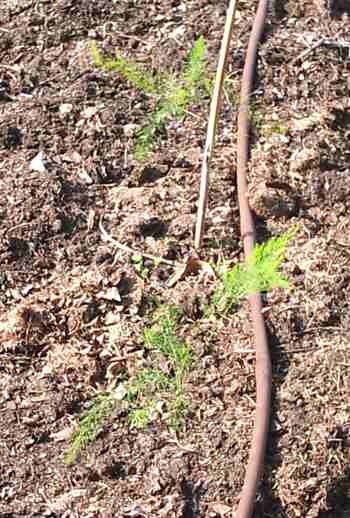
One year old asparagus crowns
I am a fan of asparagus. It makes a great side dish stirfried with mushrooms and some bacon. It is another vegetable I have never grown before so it was about time to find out how to grow them. I was in Bunnings and had a wander through the garden department and bought a couple of crowns to see how they would go. So far they are doing it on their own and haven’t been any problem at all.
These two crowns are 12 months old and were transplanted on the first of July
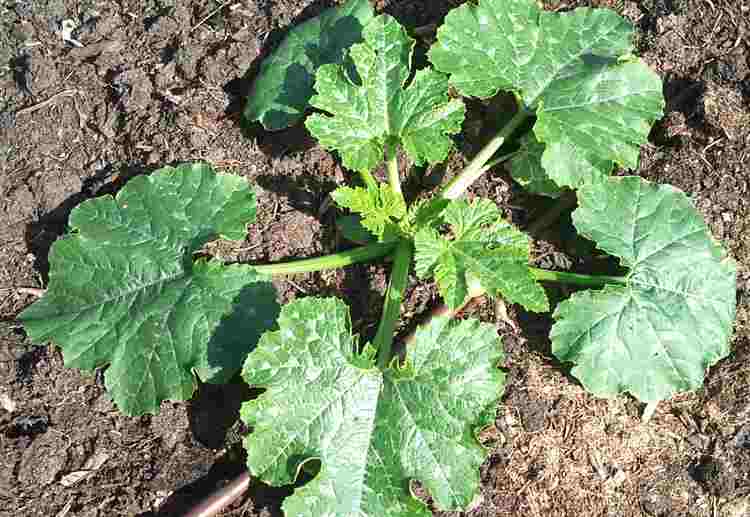
Zucchini Blackjack
A punnet of four zucchini was purchase on the 21 June and transplanted the next day. From their growth you wouldn’t know it was a winter garden.
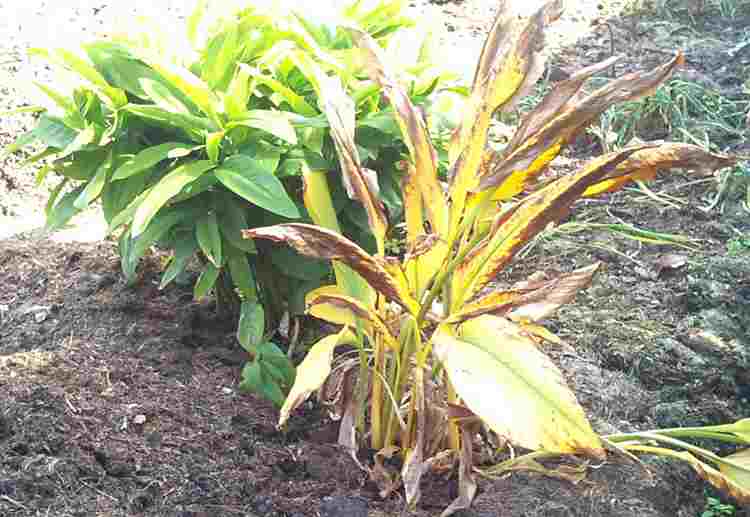
Turmeric and Galangal
It looks like it is time to harvest the turmeric. I am looking forward to seeing what the rhizome looks like and to try some. I have read amazing claims about the health benefits of turmeric so it will be good to see if any of the claims are anywhere near true.
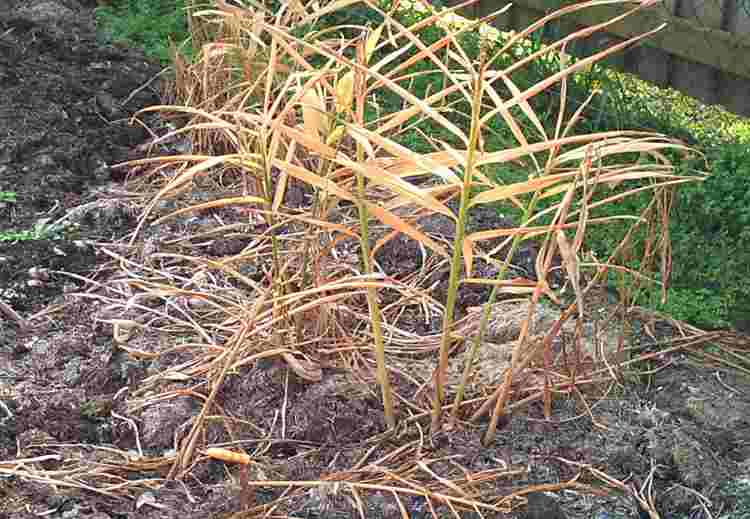
Ginger ready for harvest
Since this picture was taken the ginger has been harvested and with the other ginger harvested earlier there was in excess of 8 kilos. I have enough ginger for the next 12 months and for replanting. I have prepared the same bed with two barrowloads of compost, some crusher dust and some lime.I am looking forward to having a go a making some ginger beer.
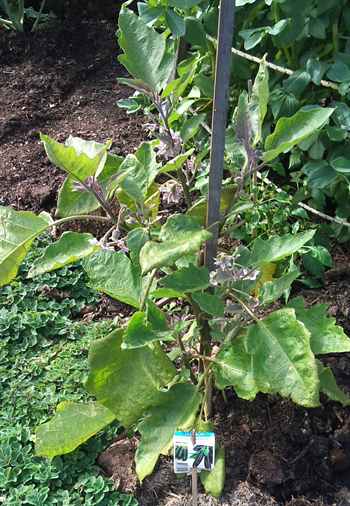
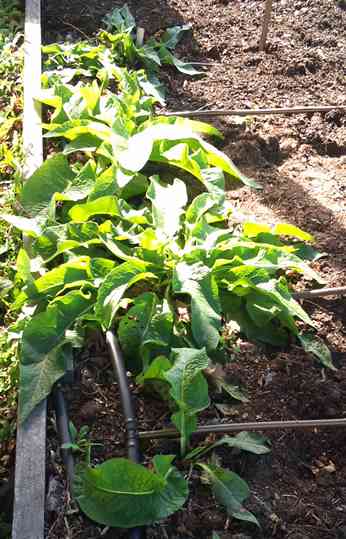
Egg Plant
Here’s a plant that loves the hot weather, the hotter the better. I am surprised to see it grow so well in winter. The catch is that so far none of the flowers have turned into fruit. It is probably the opposite of the broad beans in that it needs temperatures higher than what they are at the moment to set fruit. I will keep persevering and see what happens.
The ground cover under it is supposed to be Dutch coriander, but it doesn’t look anything like a parsley or coriander. It will be interesting to watch what it ends up like and what it tastes like.
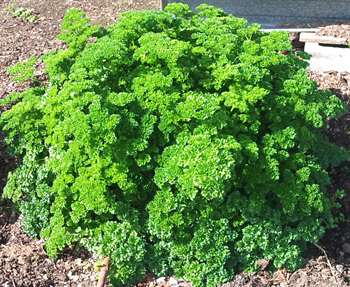
Too much parsley to eat
Talking of parsley, something is agreeing with the parsley as it is growing so well I have to pull handfulls at a time off this bush and feed it to the compost pile.
Must be all the compost it is growing in and the watering system.

A vounteer tomatoe in the old worm bed
I love volunteer tomatoes. This one has grown out of the old worm bed along with a passionfruit vine, though it is pretty hard to see the passionfruit as the tomatoe is out competing it. I think they are Grosse Lisse variety. They are quite firm and very tasty.

Snow Peas
Waiting for the snow peas to climb the trestle work and deliver some peas.
Everything seems to be growing well
There are a couple of other items I have missed but will do them another day. However the wicking bed needs to be included. I have only filled it the once and it still seems to be moist enough for everything to grow.
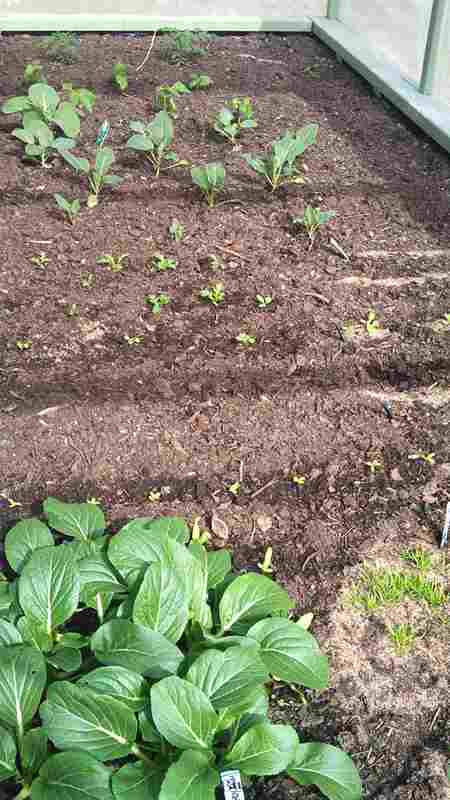
At the top are two Black Russian tomatoes, then French beans, cabbage, cauliflower and Chinese and Japanese greens. All the small seedlings were grown from seed directly sown in the bed.
The larger leaf plant in the front are Choy Sum. They were grown in a punnet and transplanted.

Wicking Beds
Insect mesh in place and ready for planting
I finallygot the wicking bed finished and the insect mesh attached. The final finish is not as good as I wanted as I couldn’t figure out how to keep the insect mesh in place and still get easy access.
My stop-gap solution is to hold it in place with boards and a couple of screws in each board. The battery operated screwdriver comes in handy attaching and removing the boards.
If you can think of any simple, elegant solutions to my dilemma, I would be pleased to receive them.
Seedlings and Seeds Planted
One of my aims was to have the wicking bed planted just after the winter equinox which was 22/23 June. I’m about a week late but I got the Black Russian tomatoes in the soil yesterday, which was 1 July 2015. Today I got the trellis system in place and will show you how to tie up tomatoes and prune them as they grow. It is quite simple and can be used outside in the garden as well. All you need is some support for the string that will be the support for the tomato plant.

The turnbuckle tightens the supporting wire and the wire is passed throught the hole, around the pin and back through the hole.
The tomatoes are at the southern end of the wicking bed as they will be the tallest plants in the bed, unless I decide to grow some climbing beans as well. If that happens the tomatoes should be well advanced by then. They are at the southern end so they don’t overshadow all of the smaller plants like choy sum, spinach, endive and all those greens that go in stirfries, soups and salads.
So far I have planted seedlings for tomatoes, cabbage, cauliflower, dwarf french beans and choy sum. Seeds have been sown for choy sum, Tat Soi, chinese kale,spinach, minutina and endive.

Natural Gardening
Three levels of growth, aerial shoots, rhizome and tubers
I harvested some Yacon the other day and was quite surprised when it actually tasted like the descriptions I had read. The tubers taste something like a Nashi pear, a little sweeter and more fluid but a crunchy texture. We put some in a salad and I was picking the pieces out, they were that tasty.
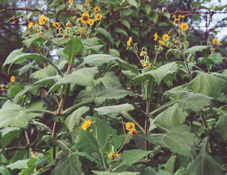
Yacon is a part of the sunflower family. Spikes can grow to 2 mtrs with small daisy like flowers
The plant takes 6 – 7 months to reach maturity. After flowering top growth withers and dies back and the tubers are harvested. They resemble dahlia or sweet potato tubers, on average weigh about 300 g but can weigh up to 2 kg. Once the soil starts to heave at the base of the plant, dig around to ‘bandicoot’ a few early tubers to extend the harvest season. The tubers continue to sweeten as the plant dies back so the main harvest should only take place once all the top growth is dead, usually by May. Don’t leave it too long though, especially in areas that have mild winters, as the plant will start to shoot again as the weather warms up and the days get longer. The plant needs to be dug carefully to avoid damage to the crisp tubers. After separation from the central stem undamaged tubers can be stored in a cool, dark and dry place with good air circulation for some months. The average sugar content of the tubers increases during storage because of starch conversion. They can also be exposed to the sun for up to 2 weeks to accelerate the sweetening process.
My Yacon Yield
The yield was not huge for the size of the plant and the reproductive part, which is a perennial rhizome looking a bit like ginger. The rhizome grows near the surface and sends out large aerial shoots that eventually produce a tiny yellow flower.
Underneath the rhizome the Yacon produces the tubers. This is the part that is of value to the people who grow it.
The Yacon is a native of the Andes from Colombia to northern Argentina. This could be why the harvest wasn’t as prolific as suggested as I am growing it in Queensland.
According to Wikipedia: Yacón can easily be grown in kitchen gardens in climates with only gentle frosts. It grows well in Kathmandu, Nepal and southern Australia (including Tasmania) and New Zealand, where the climate is mild and the growing season long. It does not grow well in New South Wales, Queensland, or Northern Territory.
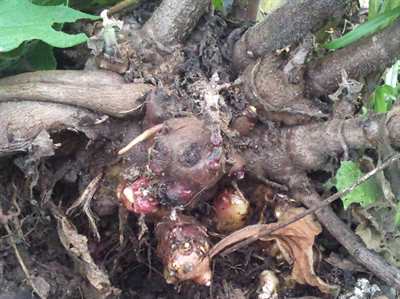
Yacon rhizome, looks a bit like ginger
In this picture you can see the perennial rhizome below the aerial shoots and below the rhizome are the tubers. The location I had them growing wasn’t the most fertile in the garden. This year I will create a very fertile location with plenty of compost and see if they give a better harvest.
Health Benefits
Like all new crops and crops that are not well known there are amazing claims of health benefits. The one that I can see as being of interest is the benefit for people with Type 2 diabetes. From Wikipedia Until as recently as the early 2000s, yacón was hardly known outside of its limited native range, and was not available from urban markets; however, press reports of its use in Japan for its purported antihyperglycemic properties made the crop more widely known in Lima and other Peruvian cities. Companies have also developed novel products such as yacón syrup and yacón tea. Both products are popular among diabetics and dieters.
Uncategorized
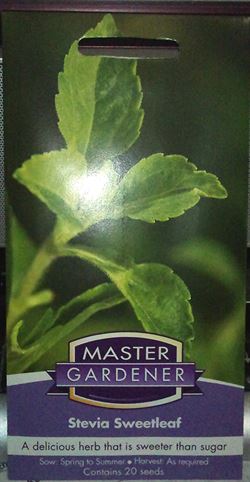
Front of the seed packet received from Mr Fothergill’s Seeds
You may recall that I was trying to grow some Stevia from seed. See this post on Stevia. I was using a seed propagating cup from Mr. Fothergill’s Seeds that they had marketed for children as the Lolly Plant.
I followed all the directions and made sure that I didn’t over water but no sign of seed germination. After about a month I sent an email to the seed company.
Hi, I purchased a couple of the lolly plant growing kits and have had no luck getting the seeds to sprout or grow. They were planted on April 29. I write a bit of a blog and what I did is noted here.https://farm54.com/stevia I haven’t overwatered. The temperature is still quite warm here so I was wondering if you could give me a few tips and maybe send some more seed so that I can have another crack at it. cheers
Prompt reply from Mr Fothergill’s Seeds
We are sorry to hear about your recent disappointment with our Stevia (lolly plant seeds); given you seem to have done everything correctly, its difficult to know exactly what may have gone wrong.
We will arrange to send you some fresh seed to try again.
Regards
Allison
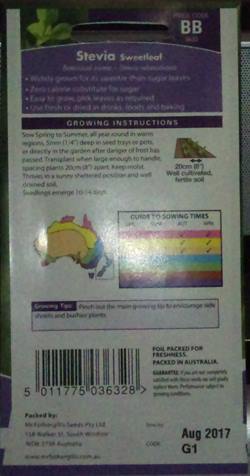
The back of the packet shows that the seeds should be sown in Spring and Summer Brisbane
I received the seeds about a week ago and I noted on the back of the packet the recommended sowing time in the blue area is Spring and Summer. It may have been too cool or the wrong amount of light in Brisbane to make the seed germinate. There are 20 seeds in the packet. I will have another go at germination after the Winter Equinox on the 22nd of June and if that fails, will wait for Spring to try again.
I was quite impressed with the response and interest shown by Mr Fothergills Seed’s.
