Machinery and Maintenance
Fifteen minutes later a wheelbarrow load of branches is chipped
It’s been a while since I did an update on the Chinese chipper mulcher I purchased about three years ago. It gets used about twice a year and what has surprised me is that every time I wheel it out, it starts first time. I haven’t had to charge the battery, just check the fuel and oil, turn the key and away it goes. You can read about it here.
Using the chipper
This time though, I did have to get a new chipper blade as I had worn both sides of the other one down to blunt. I had made an attempt to sharpen the chipper blade with a wetstone. I sharpened it enough to get me through the last time I needed to use it, but it wasn’t going to work this time. I had a few branches to put through and needed to have a sharp blade to get the job done.
I ordered the new blade when I purchased the mini tiller and it was in the box. It only took about ten minutes to fit the blade, make sure it was securely tightened and hit the starter. Away it went again.
It didn’t take long to get through the wheelbarrow full of branches. A sharp blade makes life easier.
Using the mulcher hopper
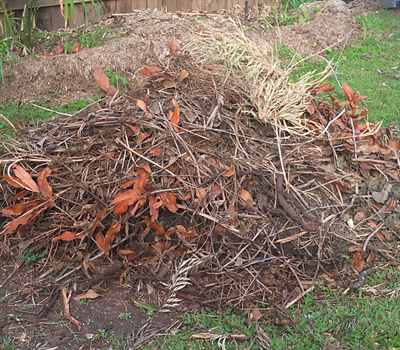
Pile of branches and old plants for mulching

Pile reduction after mulching
After running the branches through the chipper I had a pile of old plants and small branches to put through the mulcher hopper. Again the chipper mulcher made short work of it. Every time I see that advert where the guy is wheeling a chipper mulcher out of the aisle that is marked “Items only used once”, I smile as I don’t use this very often, but when I do I am pleased I purchased it. I reckon that’s the best recommendation I can give.
Machinery and Maintenance
As mentioned on the Chipper/Mulcher review page it is easy to remove the chipper blade from the chipper/mulcher. It is not as easy to sharpen it though, as it is made from HSS (high speed steel) which is hardened for the purpose it is used for.
Removing the blade
I tipped the machine up and rested it on the tow bar and placed a large piece of wood under the front so that it would stay in position.
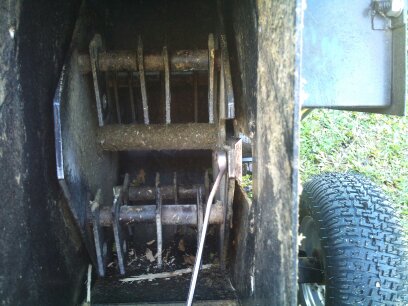
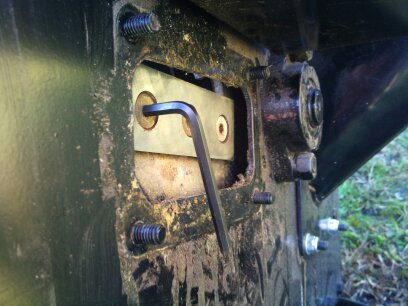
Chipper blade viewed through Access Hatch, showing Allen screws and key
The chute cover was removed and the chipper blade access cover was removed. This allowed access to the nylon threadlock nuts and the Allen screws holding the blade on.
After removing the blade I could see that it was blunt and had some nicks in the blade. The blade has two cutting faces. By turning the blade 180 degrees you get to use the second face for cutting. I had previously turned the blade. It was now time to sharpen it.

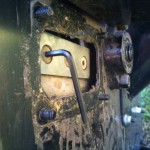
The lock nuts are accessible after the chute and screen are removed
This was to be done with a file and stone. I don’t have power in the shed yet. It took quite a while to make an impression on the cutting face and to partly remove the nicks in the blade. The good thing was that it gave me some practice on getting the filing angle correct and some practice using a sharpening stone.
Next time I will take it to a mate’s mower shop and get him to sharpen it for me.
I was able to finish the job I wanted to do with the chipper. Thankfully I had sharpened it enough for that.

Machinery and Maintenance
Go to the page for 15hp Chinese Chipper Mulcher Review
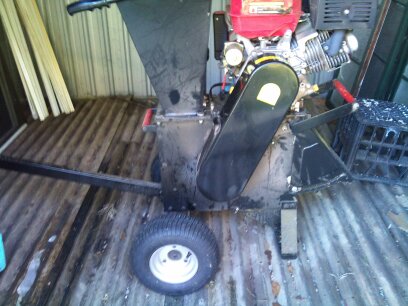
When I was last putting vegetables through the hopper the blades were slowing down as the scraps were fed in. It made me think that the belt that turns the hammer blades and the chipper blade had stretched. I needed to take the belt cover off and have a look at the belt.

Remove Belt Cover
There are three bolts with lock tite nuts that hold on the cover. They were quite easy to remove using two 13mm spanners.
As I was removing the cover, a bolt dropped out. Unusual, and even more unusual when a big washer and a spring washer dropped out as well. When I got the cover off there was also a piece of steel that goes in a key way.
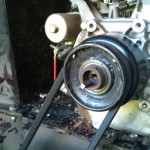
Replacing Key in Keyway
Bore With Square Keyway
Seeing everything that had dropped out made it easy to figure out what had happened. The shaft from the motor drives the pulleys that are connected by the belt. The bolt had vibrated loose and the key had slipped out of the key way. The pulley was only being turned by friction. As soon as there was a little pressure on the flails the pulley would slip on the shaft.

Tighten the Pulley Bolt
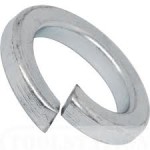
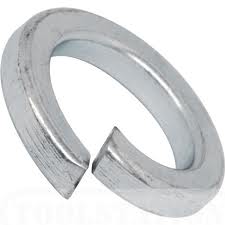
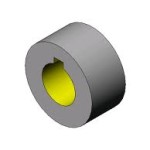
Spring Washer
Fixing it was no problem. Just line up the shaft with the keyway and knock the key back in. Don’t go bashing the key directly,

Final Tighten
use a piece of wood or flat piece of metal as a buffer when you tap it back into place. The washer was bent and was stopping the spring washer from being effective as a lock on the bolt. I turned the washer around and tightened it up, flattening the washer in the process.
Next I replaced the belt cover.
Hint or Tip
If you are doing this, put the bolt that has the nut over the cover back first. I put the others on first, and of course when I put the last one on I dropped the washer and lock nut into the cover and had to take it off to get them out.
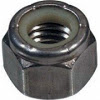
Lock Nut
A close look at the lock nut shows that it has a nylon sleeve. As the nut is tightened, the thread on the bolt cuts into the nylon, holding it firmly in position.
I guess I have to give this a tick and a cross. The cross because the bolt was tightened too far by the manufacturer, bending the washer and preventing the spring washer from doing its job of keeping the pulley bolt in place stopping the key from coming out.
The tick is for the ease with which the cover was removed and the problem fixed.
So far the chipper maintenance has been easy to do with everything accessible and easy to work out.