Experiments, Natural Gardening
I like growing Soy Beans. Don’t ask me why as I have no real reason to. I think it stems from my days on a sugar cane farm where we grew it as a soil conditioning crop which made the cane grow gang busters when planted after soybeans.

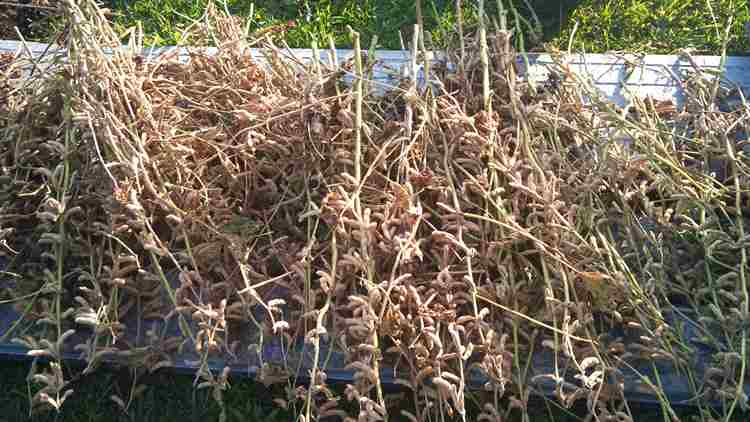
A few more weeks needed for the soy beans to dry to the right moisture content
I grow them in any new gardening bed as the first crop. This year I had a new bed that I made by solarising the weeds with black plastic for 12 months and then covering with a layer of big cardboard boxes I had been collection and then covering with 30cm of compost. I also threw in some crusher dust and lime. Soy beans love lime.
Final drying after harvesting
To harvest them I cut them off at ground level, leaving the root system in the ground. Hopefully the rhizobia nitrogen fixing bacteria will survive in the root nodules until another crop they like is growing. Now I have to find a use for the beans.
My answer to a use for the soy beans is soy milk. Another use is green soy beans as an entree, see this link for eating green soy beans Soy Beans and Nitrogen Fixing Bacteria
Where to get Soy beans, if you don’t grow your own

Available at Asian Supermarkets
If you don’t want to grow your own soy beans, you can buy them at Asian grocery stores. They are not expensive, around $4 for 1 kilo. The soy beans that you use are white or cream in colour and you only need a cup full to make around 1.5 litres
Traditional Taiwanese method for making soy milk
You will need a blender, a big pot, soy beans, a deep bowl, a stirring spoon and a muslin or filter bag.
Place the beans in the deep bowl, cover with water and soak the beans for 6 – 8 hours.
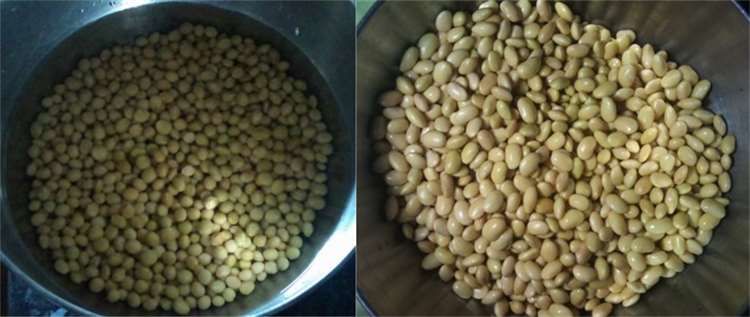
Soy beans with water covering ready for 8 hours soaking and after soaking
How to know when your beans are ready for making soy milk
These beans are ready for making soy milk
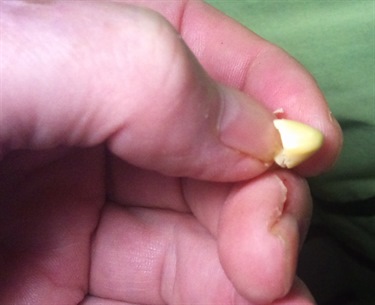
To test whether your beans have soaked long enough, dig into one with a finger or thumb nail. If you can split it, your beans are ready for the bender.
The beans expand to nearly double the size after soaking.
Add equal quantities of beans and water to the blender and run it for a couple of minutes.
If the blender seems to have trouble moving the paste, stop the blender and add some more water and stir it up with a spoon. Blend again and then strain into the big pot. Place the pulp back into the blender and add the same initial amount of water and reblend.
Bring the strained soy milk to the boil slowly, stirring constantly so that you don’t burn the milk. A big pot is helpful here, because like cow’s milk, it will foam when about to boil and expand to overflow a small pot.
Once it has boiled, turn the heat down and simmer for 30 minutes. Again you need to stir it so that it doesn’t burn.
After 30 minutes remove the heat, add some sugar if you need it, or stevia if you have it, or try some honey. We started with 2 small cups of beans and ended with 1.8 litres of soy milk. If you have ever been to a Taiwanese breakfast shop and tasted their soy milk you will probably agree that the taste is completely different to the cardboard flavoured product you purchase in supermarkets.
Natural Gardening
I have learnt a number of useful hints and growing tips for garlic. This has been over the last two years and trying four different garlic varieties.
- Garlic is a colder weather crop.
- Plant it from the Autumn equinox (22 March in the southern hemisphere) through to early Spring
- The warmer the climate the earlier you can plant.
- There are different varieties of garlic suitable for colder areas and warmer areas
- Saving your best garlic bulbs for replanting improves your results over time. You develop your garlic to be acclimatised to your area.
- Cloves of garlic from the same bulb can take anywhere from four days to 2 months to sprout, even if planted on the same day.

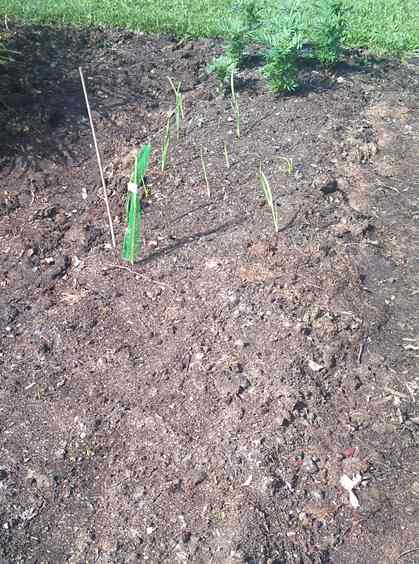
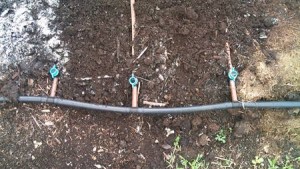
Although this Elephant Garlic clove was planted at the same time as the others it took 4 weeks longer to sprout
I purchase 5 cloves of elephant garlic, three took about 17 days to sprout, another appeared about 24 days after planting and this one just appeared, 48 days after planting.

Two cloves of Silverskin Garlic finally poked through after 48 days
Winterising Garlic (maybe suitable for garlic growing hints and tips)
There are a lot of claims that in warmer locations, if you put your garlic in the fridge for 4 – 6 weeks before planting it will improve the quality of your garlic. I have still to find out if this “winterising” of the garlic before planting is of benefit or not.
Next year, I will winterise half of a bulb and store the other half normally. I hang it in the shed in a hessian bag. When I plant I will mark them and see how the harvest goes.
There are other posts on garlic Garlic Update and Planting Garlic – Four Varieties
If you have any garlic growing hints and tips, help me out and add them in the comments.

Experiments, Natural Gardening
Stevia Plant
I have been a fan of the sweet herb stevia for a while now. Ever since I met a lady who wanted to start a business making cakes and deserts for diabetics. This was back at the turn of the century. She started her business before finding out that stevia was not allowed to be used in the commercial preparation of foodstuffs. It was against the law.
Go to this bit of a rant about stevia I did a couple of years ago. stevia
Stevia is now an allowed input for foodstuffs. Coca Cola now even use it as an input.
You may have read in one of the posts that I grow soybeans from time to time. I want to produce a traditional soy bean drink for our own use. My partner has a bit of a sweet tooth so I want to grow some stevia to sweeten the soy drink.
I finally got around to getting some stevia. I had looked on a number of occassions and plants looked overpriced to me, they were up around $12 to $18 and postage was another $12 or so. Most of the stuff I read about growing from seed said it was difficult and I was finding it hard to source some seeds.
Stevia Growing Kit
Finally I found the lolly plant at Bunnings. It is a Mr. Fothergill seed raising kit for kids and priced at $3.98. I have planted the seeds and done everything by the instructions and you can see it all via the pictures below.

One of the Stevia Lolly Plant Grow Kits available from Bunnings. You may have to squint to read the instructions as it was hard to get a clear photo off a round container.

The growing media is a dried compressed media like coconut fibre. You add a cup of warm water and wait about 10 minutes or so for the water to be absorbed. There were nine seeds in the packet and they are small.
After pushing nine indentations in the growing media with a pencil, I wet a toothpick to pick up the seeds and dropped them in the hole.

The pencil was used to make the holes for the seeds. The long handled spoon to cover them. After taking the cardboard from the lid, it was placed on the growing cup and the stevia seeds in the container placed on a warm northerly window sill.
I should see seeds sprouting in 1 to 2 weeks. These kits were made for kids, hopefully they are adult proof as well.
Natural Gardening, Vegetable Trials

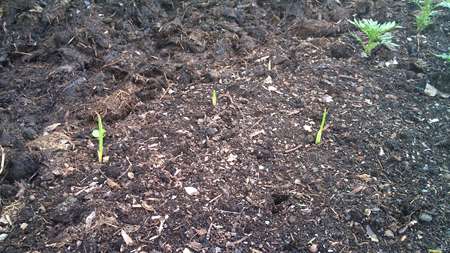
Garlic varieties take different time lengths to sprout
Since planting the garlic I have learnt a few things so it is time for a garlic update – see Planting Garlic – Four Varieties
Originally when pIanted the garlic, I thought they would all sprout at around the same time and that sprouting would only take 4 -5 days from planting. This was my experience from previous plantings. But previously I had only planted garlic from Woolies, so my experience was probably with only one variety.
From looking at the previous post I planted the garlic on either the 21 or 23 March. The Glen Large sprouted in 4 days. It is now the 7 April and the Silver Skin is just starting to poke through, which makes 14 – 16 days to sprout. There is no sign of the Elephant Garlic yet.
It has eased my mind a bit, as I was starting to think that the winterising (putting in the fridge for 6 weeks) had affected the garlic that hadn’t sprouted. I put in a call to Green Harvest where they quelled my fears by saying that some garlic can take up to 6 weeks to sprout.

Silver Skin Garlic Poking Through after 14 – 16 days
In case you are wondering, the grass clippings beside the bed are on the walkways through the garden. I use the walkways for trench composting. At various times throughout the year, I will place all the composted material from the trench walkways onto the garden beds. I will then refill the trenches with whatever material I have, from fresh lawn clippings to semi-composted clippings and other composted material. I will also throw in some crusher dust and lime.
The lawn clippings should also generate some heat as they compost which will be welcomed by the plants as we head into winter.
If the lawn clippings have been there for a while, I will also use them as mulch and to help suppress the weeds. I don’t worry that they are a bit water repellant as the dripper lines are under them in the garden. When it rains heavily in Brisbane, it doesn’t matter how water repellant a material is it still gets soaked.
Further Update 9 April 2015
Woohoo, the Elephant Garlic has made an appearance. Two cloves of the five planted have poked their nose through. Looking forward to the rest appearing. The sprouting times are now Glen Large and Woolies garlic around 4 days, Silverskin garlic 14 – 16 days and Elephant garlic around 18 days.
Natural Gardening
Don’t irrigate two weeks before harvesting garlic. I can turn off the water to this bed.
In the last post about garlic Garlic Time Coming Up I mentioned that I was waiting until the Autumn equinox for planting garlic. Well here in Australia the Autumn equinox is March 20. I would have been planting garlic today, 23 March but we had a rather protracted thunderstorm from about 3pm and it is still making its presence known at 8pm.
So tomorrow I will get my three varieties from the fridge and get them in the ground. The reason they are in the fridge is because garlic is a cold weather crop and putting it in the fridge winterises it. From what I have read, the suggestions are from 2 weeks to six weeks, with one grower storing all his garlic in the crisper as soon as it is harvested. What isn’t eaten is planted next season.

The garlic from Woolies has sprouted after a week
Winterising Garlic
I have never winterised garlic before so this is a bit of an experiment. To give me something to measure against, I purchased a pack marked Australian garlic from Woolies. It was already in cloves and in a small flatpack. There were about a dozen good sized cloves. These were planted around a week ago and I noticed today that they were poking through. My previous efforts with supermarket garlic haven’t been brilliant, so we will see how this one works.
Bed preparation.
I use the trench method of composting. Originally I dug trenches where the walkways are and built up the garden beds on each side of the bed. I then filled the trenches with lawn clippings and cardboard. I also throw some lime in and crusher dust and let it decompose and compost over the next twelve months. When it is time to renovate the garden beds, I dig up all the walkways and turn up all the composted material onto the beds. There is a bit of exercise involved which is all good. The material from the trenches is great, full of worms and seems to help everything grow.
Because of the amount of compost from the trenches that go on the garden beds, I don’t have to do much digging when planting. The soil as that loose and friable, it is a pleasure to get your nails dirty.
Getting enough lawn clippings
I have a lawn mowing contractor drop off lawn clippings from time to time. Recently he has been here every week because of all the rain we have had. If I can’t put it straight into the trenches, I pile it up and let it compost away until I need it.

I promise the Glen Large has sprouted, you just can’t see it with the image reduction
Update
I wrote the draft for this post on 21 March and four days later the first Silver Skin Glen Large garlic was poking its nose throught the soil. The Glen Large Silver Skin and the Elephant Garlic has yet to make an appearance. I planted the cloves of the Glen Large and the Elephant deeper than the Silverskin. The smaller cloves looked like they shouldn’t be as deep.
Correction
Thank goodness I marked the beds to know which is which garlic. The Glen Large is the garlic that has sprouted, not the Silver Skin.
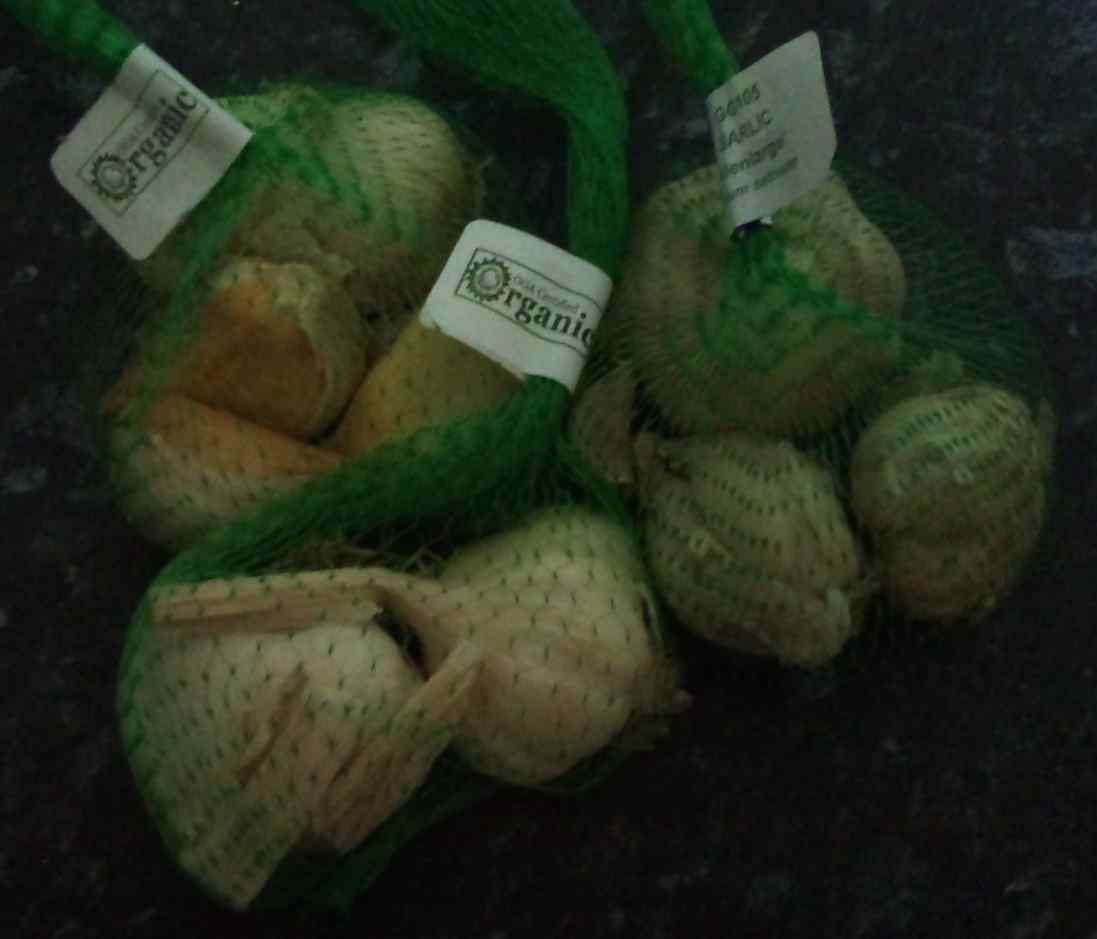
The green net is the bag the garlic came in with the tag showing which garlic it is. Hopefully I haven’t put the wrong bag on the bamboo stick. Anything’s possible. All’s good, I am off to buy some fish. Check out the header, I’ve started work on the wicking bed.
Natural Gardening
Marcia or Marsha – I agree to whichever one you like.

Ingredients in, power on, thunderbirds are go.
In the previous post Compost Tea Brewer I detailed how to make a brewer and that I would let you know how it went. I am surprised and impressed. It went better than I expected.
With these sort of remedies or therapies for plants it is a little bit like voodoo, there is no real scientific evidence to justify the claims of how good they are. I had always thought that brewing microbes would be of benefit to plants but had no real way of finding evidence based on measurable results. And at heart, I am a bit of a sceptic until I have proven it for myself. (more…)